ural spare wheel

Frequently Asked Question: How Much?

Part One: Basic Prices Explained

We have been receiving quite a bit of inquires about the differences in models and pricing for new Urals. Perhaps it has become a little tricky with the growing number of custom options we now offer. Let us clarify and simplify a bit. We hope this will help answer some of the questions. You can also always drop us a line at sidecarsmakeyouhappy@ural.com.

Be safe and healthy. Go for a ride if you can!

The Team at Ural

Ural Gear Up Slate Top View.JPG

There are two models in our 2020 line up: Ural

Gear Up and Ural cT

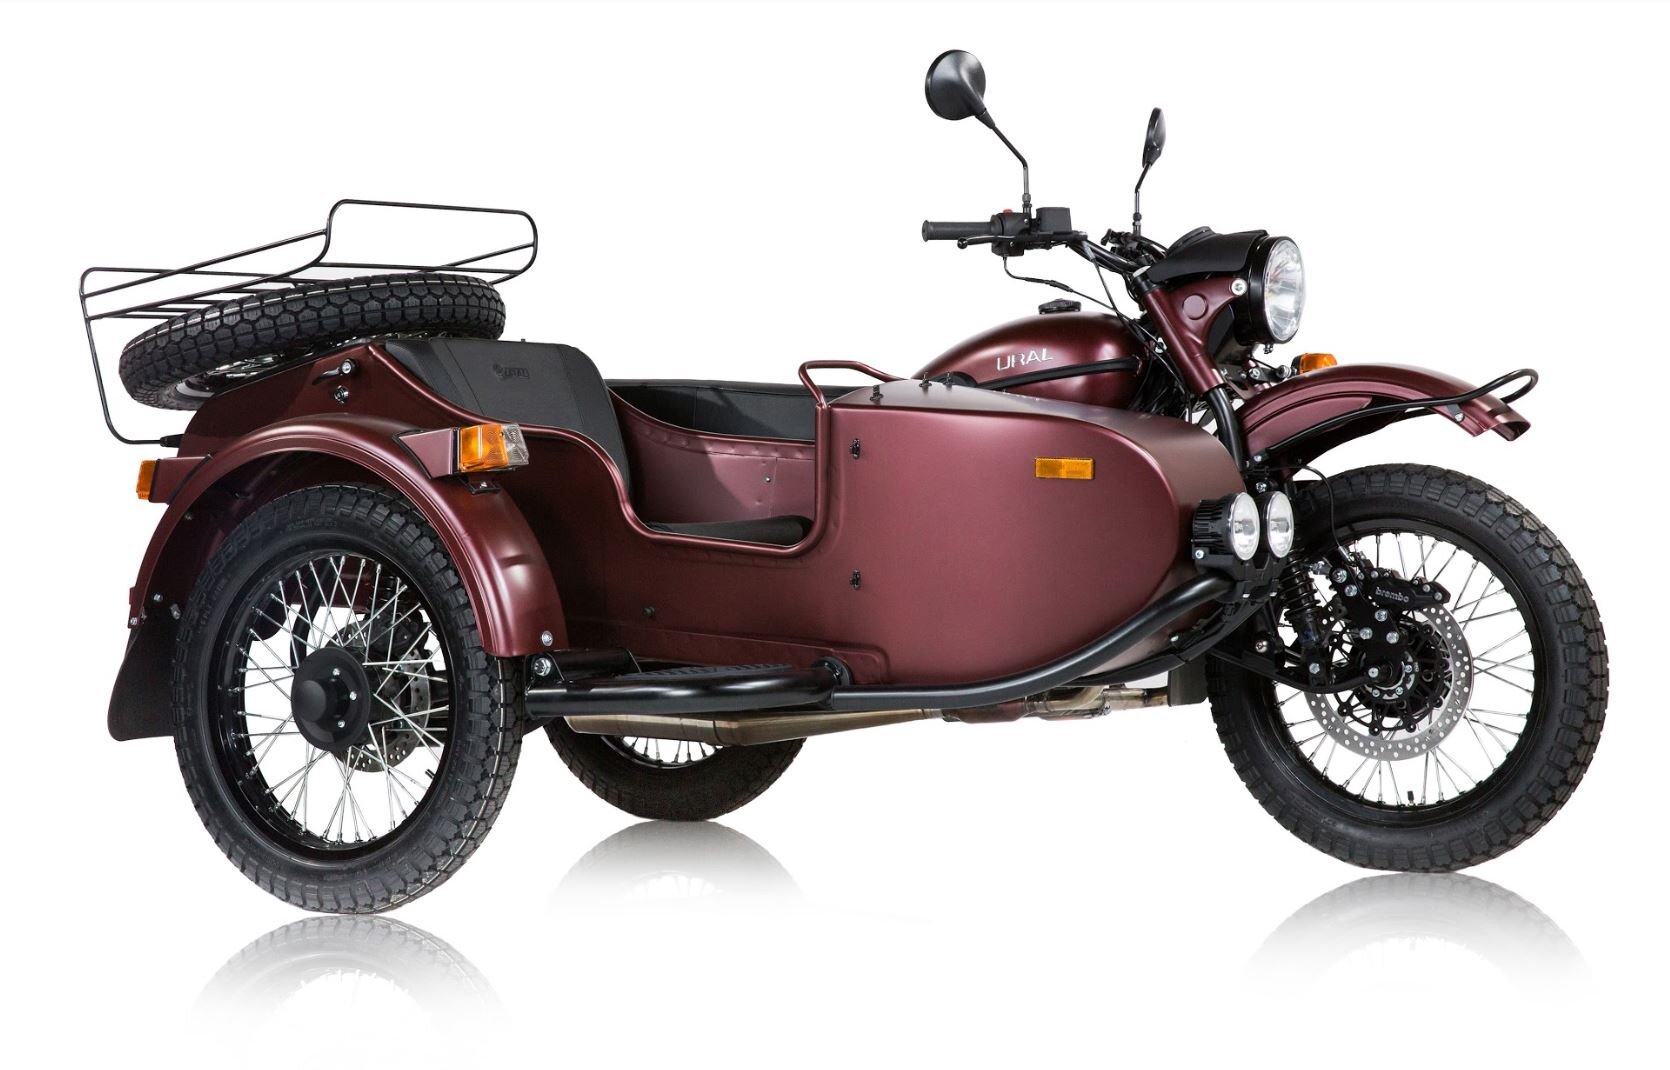
Ural Gear Up Burgundy Satin 2020.JPG

The legendary Ural Gear Up

MSRP US: $17,549 usd

MSRP CANADA: $21,999 cad

Ural cT OD Green.JPG

The Ural cT

MSRP US: $15,549 usd

MSRP CANADA: $19,999 cad

The principle difference between the two is cT is 1WD and Gear Up is 2WD. Think of it as Gear Up is your AWD Subaru Forester and cT is the Subaru Impreza – lower to the ground, sportier. We are the only motorcycle company that compares its motorcycles to cars.  On the official company blog. Because why not? :)

You can compare the technical specifications for cT and Gear Up by clicking the button below.

We will write up a more in-depth comparison of cT vs Gear Up performance and handling in another post.

For now let’s start with basic information:

Slate Grey Ural Sidecar Motorcycle Gast Tank.JPG

Gear Up standard colors:

Slate Grey,

Burgundy,

OD Green

Gear Up standard accessories include:

  • LED Sidecar Fog Lights

  • Sidecar Power Outlet

  • Sidecar Tonneau Cover (Cordura)

  • Jerry Can

  • Folding Utility Shovel

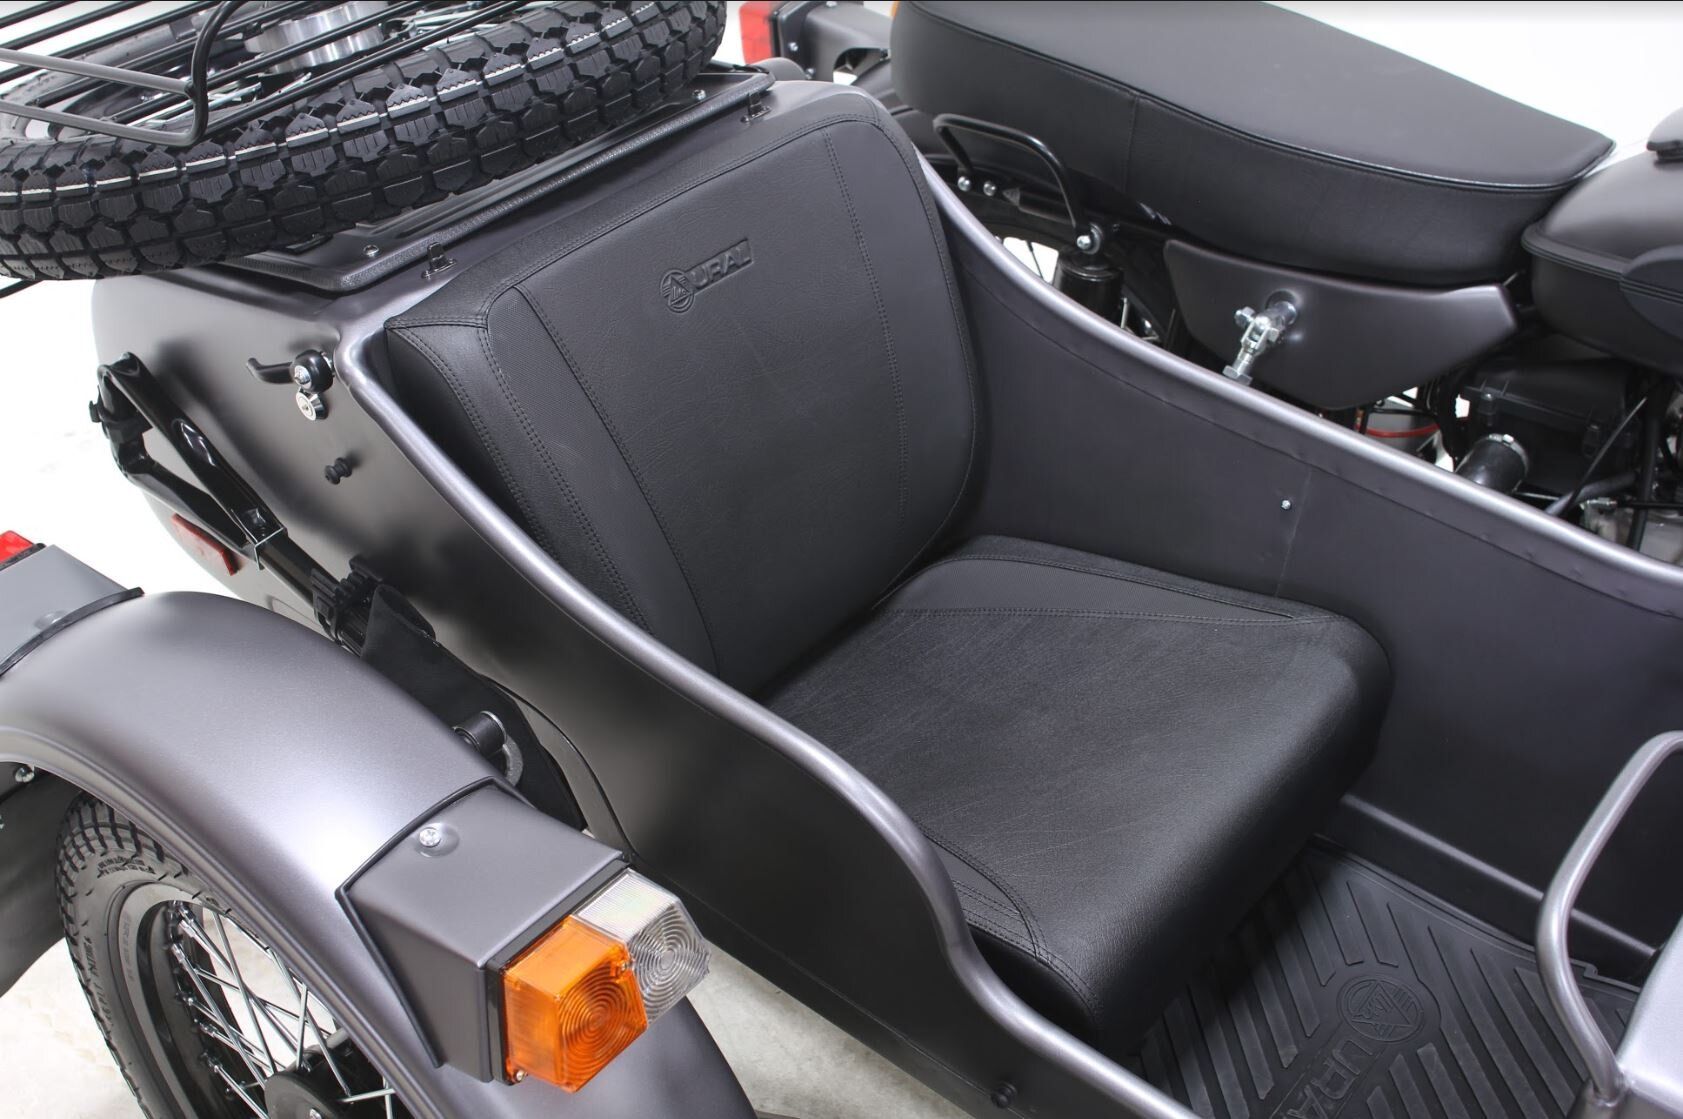
  • Universal Spare Wheel - Fits All 3 Positions

  • Spare Tire Luggage Rack

  • Enduro Bench Seat

  • Passenger Handles + Footpegs

Ural Gear Up Slate Grey Bench Seat Shovel Sidecar Spare.JPG

Ural cT OD Green Sidecar.JPG

cT

standard colors:

Slate Grey,

Burgundy,

OD Green

cT standard accessories include:

  • Sidecar Windshield+Apron (Vinyl)

  • Sidecar Power Outlet

  • Sidecar Tonneau Cover (Vinyl)

  • 2/3 Deluxe Solo Rider Seat

 
Ural cT OD Green Driver Seat.JPG

Price:

MSRP – is Manufacturer’s Suggested Retail Price. MSRP excludes tax, license, registration, delivery, set-up, and dealer-installed options. Dealer prices may vary.

Shipping - there is a flat shipping fee, sometimes also called destination fee. All dealers have to pay this fee because we have to deliver bikes from the warehouse in New Jersey to each individual dealership. This fee is $695. Dealers can’t will call bikes from the warehouse, everyone, including NJ dealers have to pay $695 USD.  Alaska and Hawaii dealers have to pay more. The same rule and cost applies in Canada - flat $695 CAD fee from port to dealers (certain remote locations have extra destination charge check with your local dealer). If you get your dealer to discount this fee – know that it comes out of their pocket.

CARB Fee – there is $300 charge for extra equipment for motorcycles registered in California. This is to satisfy the State’s environmental requirements.

Assembly (or sometimes called “Set Up”) charge - Ural comes in a crate with the sidecar detached to save space. Dealers receive these crates and must perform assembly and set up according to a specific check list. On average set up takes 6.5 hours.  Usually it’s about a full day for a dealer to set up a Ural. Dealerships pay their mechanics to assemble bikes. This cost usually gets passed onto customers.

Other - there are taxes, registration, sometimes document and other dealer and state/province related fees. Each dealership and state/province are different. Please check with your local dealer.

Summary:

MSRP + Shipping + Assembly + Taxes + registration, document or any other fees which are dealer and state/province specific.

For California only - add CARB Fee.

That’s about it. In the next post (Part Two) we will talk about Special Editions, Packages and Customization.

You can check into the blog anytime to look for updates. Or you can receive blog updates directly to your inbox by subscribing below. Cheers!

How to Install Front Spare Wheel

Oh no you've got a flat!  Good thing you have one of the world's only motorcycle with a built in spare wheel!  Here we'll show you how to properly swap out your front wheel. But first, a gentle message from the lawyers:

CAUTION! TO PREVENT AN UNCONTROLLABLE ROLLING HAZARD ALWAYS WORK ON A LEVEL SURFACE. USE CHOCKS, WOOD, ROCKS OR OTHER SUITABLE OBJECT TO PREVENT ROLLING.

ALWAYS USE CAUTION WHEN THE MOTORCYCLE IS ELEVATED AND THE WHEELS ARE REMOVED. WORK TO THE SIDE; NEVER WORK UNDER THE MOTORCYCLE WHILE SUSPENDED BY THE CENTER STAND, HOIST, JACK OR BY ANY OTHER MEANS.

WARNING! MAX SPEED OF THE SPARE WHEEL ASSEMBLY IS 50MPH (80KMH)! THE SPARE WHEEL ASSEMBLY IS FOR TEMPORARY USE ONLY! REPAIR AND REPLACE THE STOCK WHEEL AND RETURN TO THE ORIGINAL POSITION AS SOON AS POSSIBLE!

FRONT SPARE WHEEL INSTALLATION

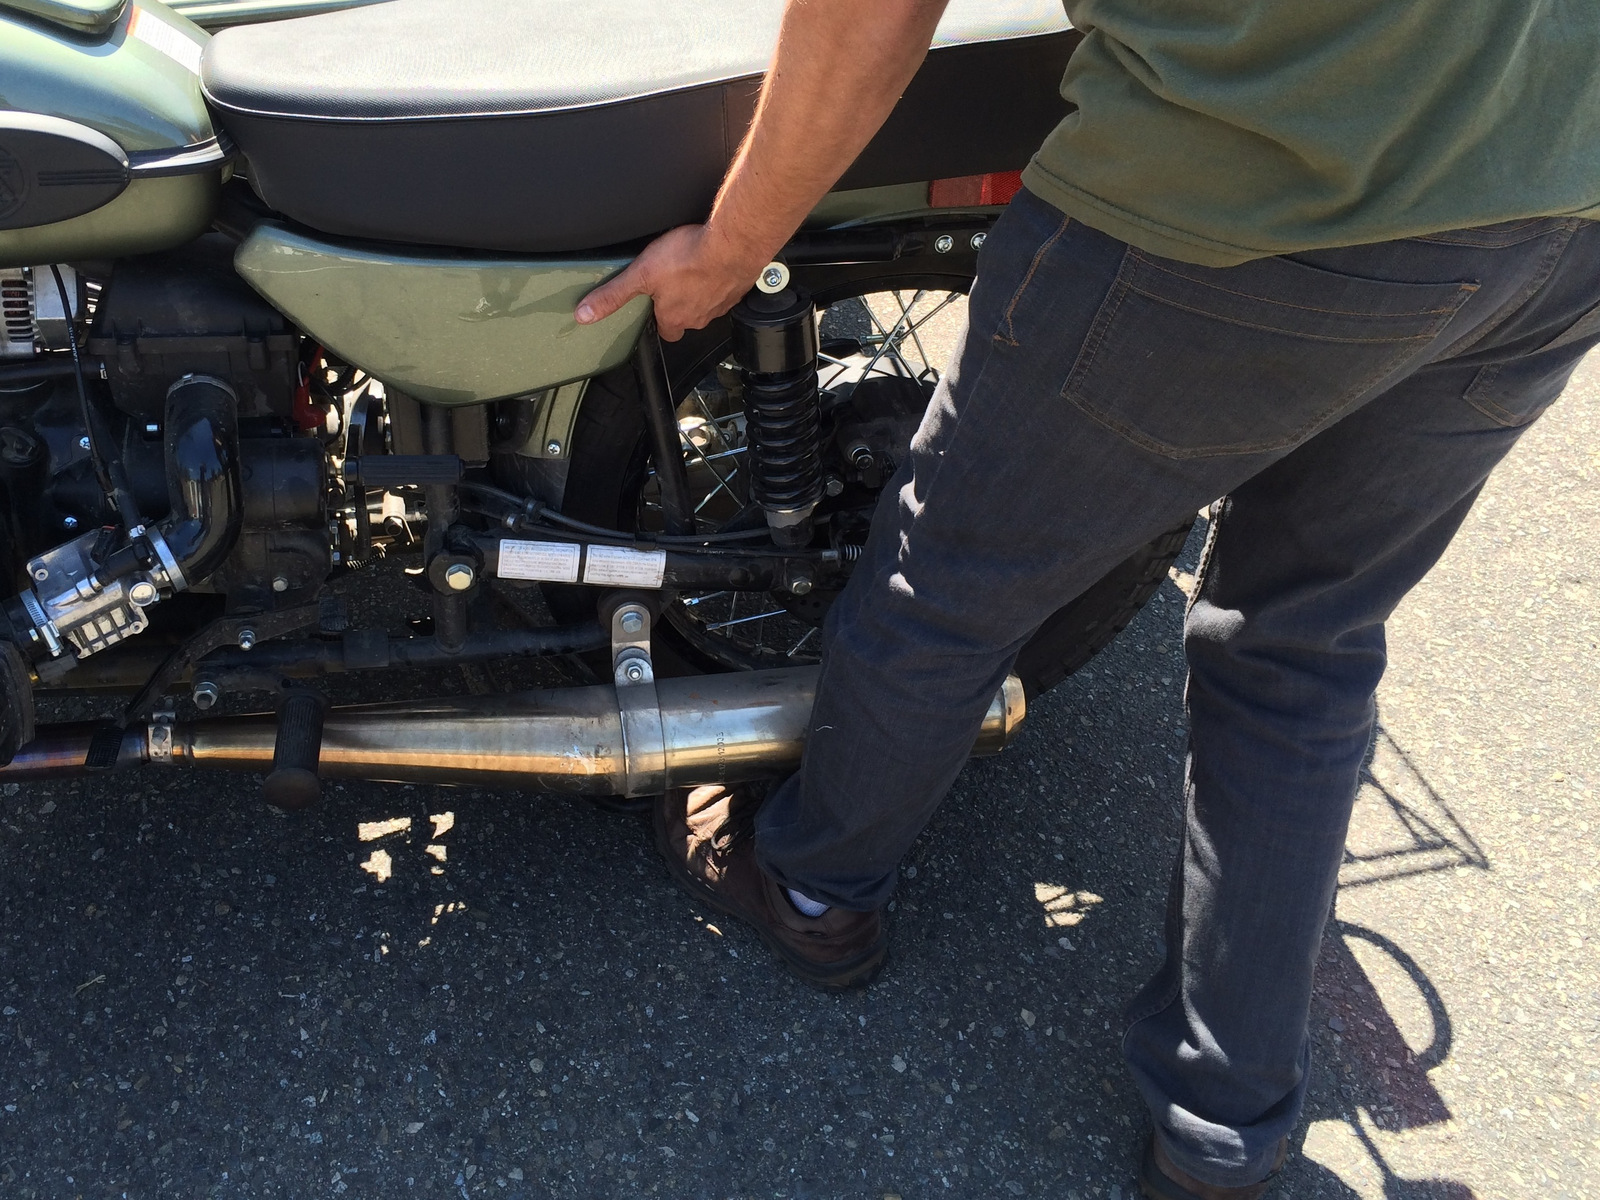
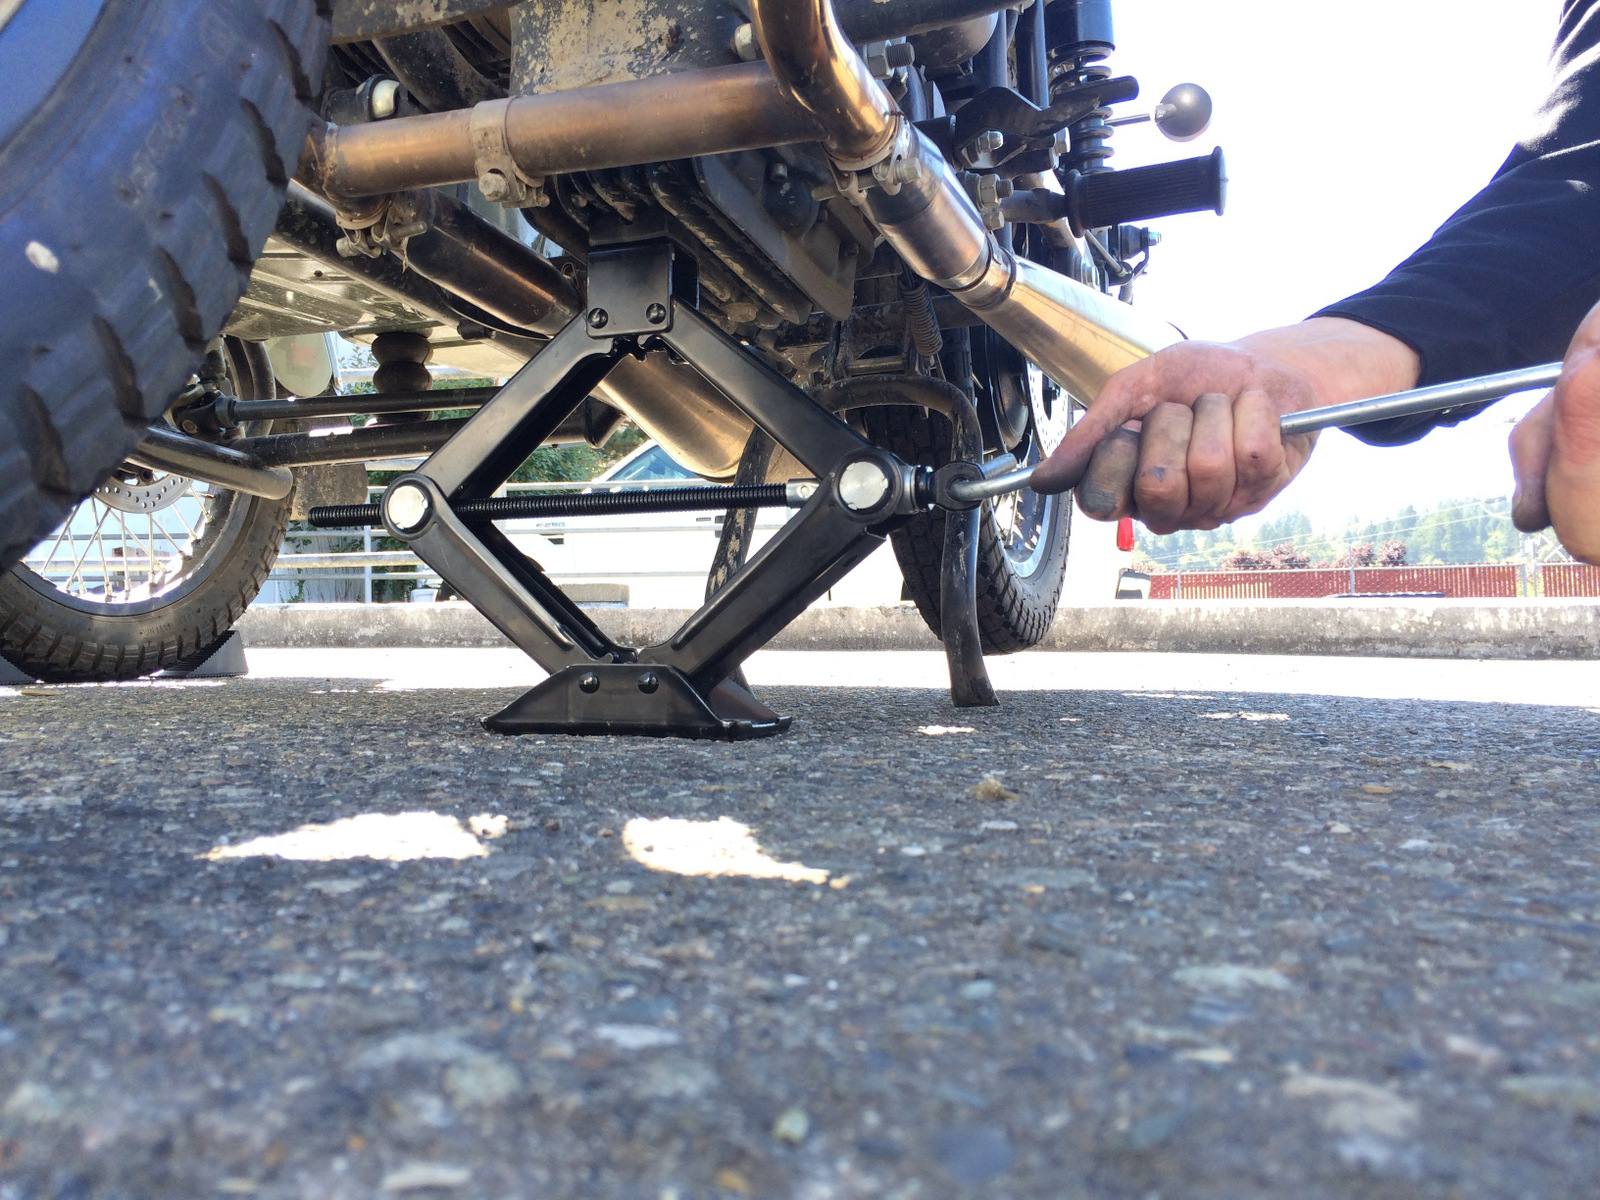
Step 1: Place the motorcycle onto the center stand.

MqlSSkFb1QeL1bI5

  • Use a jack, jack stand or similar method placed under the engines oil sump to suspend the front wheel assembly off the ground.
  • If an assistant is available they may be employed to assist with placing a jack stand and stabilizing the motorcycle.
  • Applying minimal downward force to the rear fender support easily suspends the front wheel off the ground when the center stand is deployed.


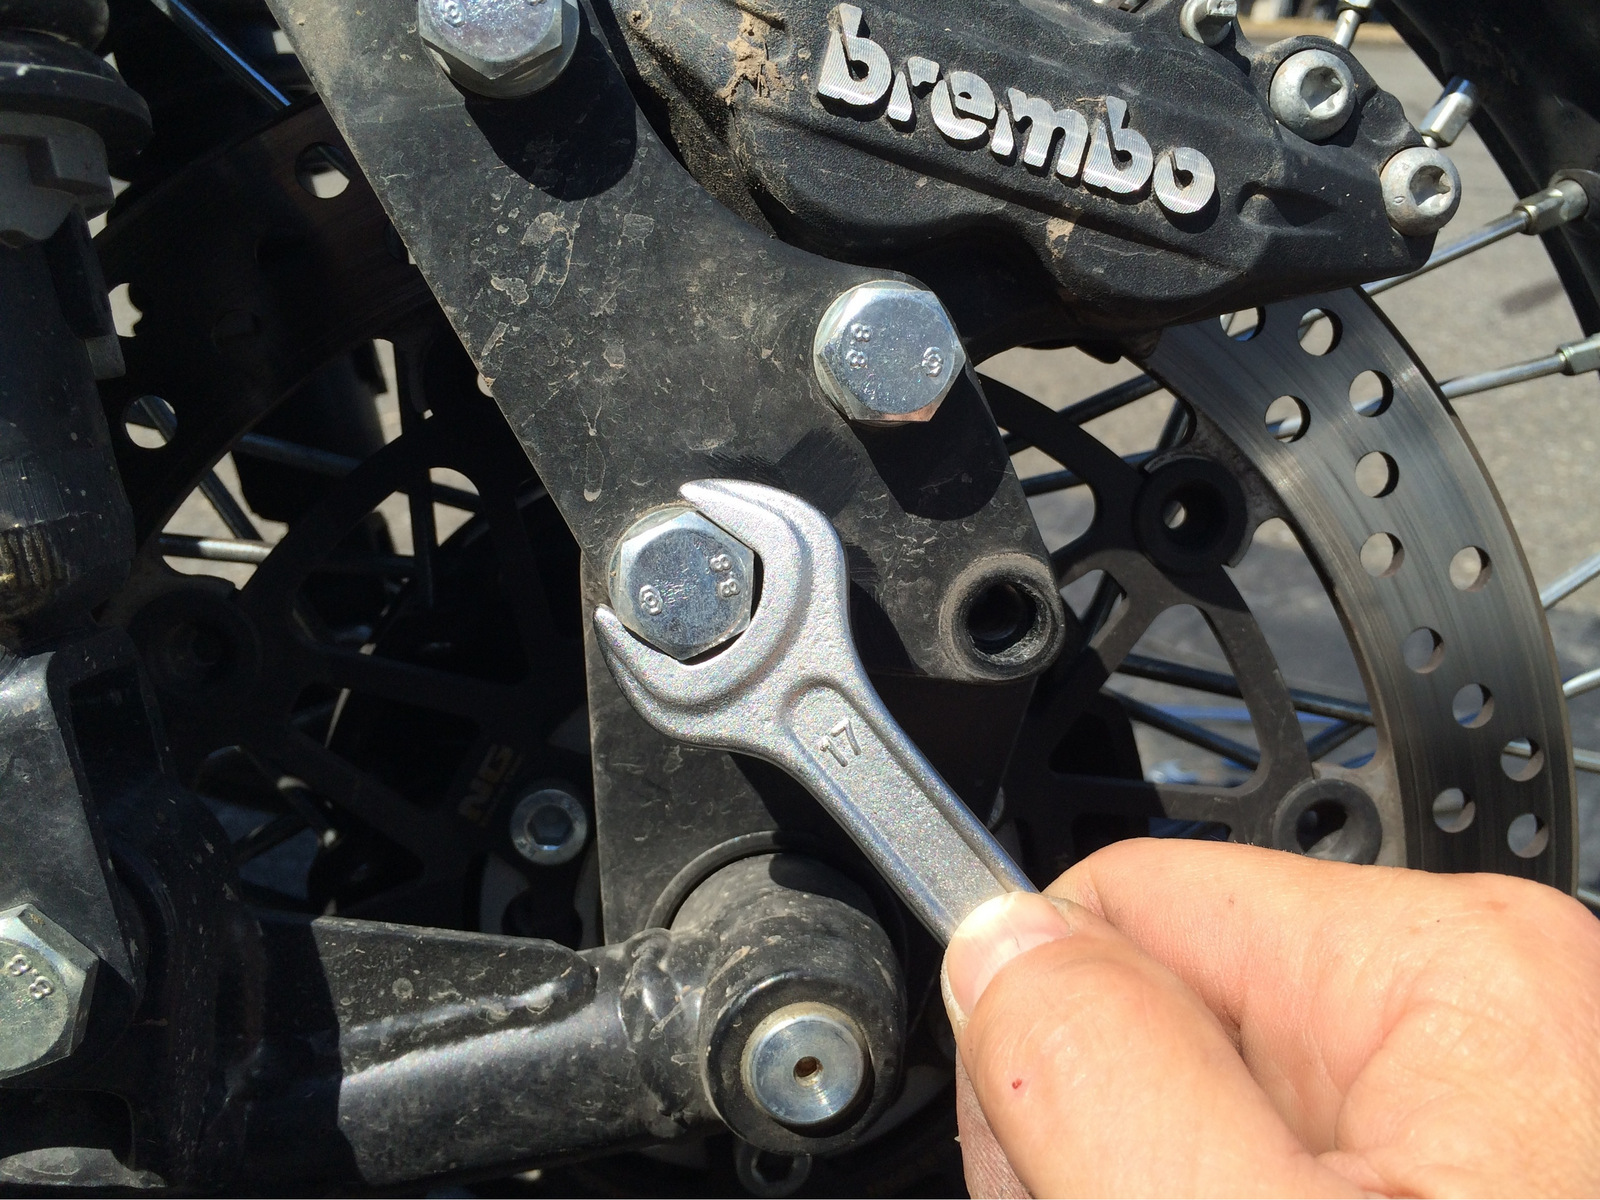
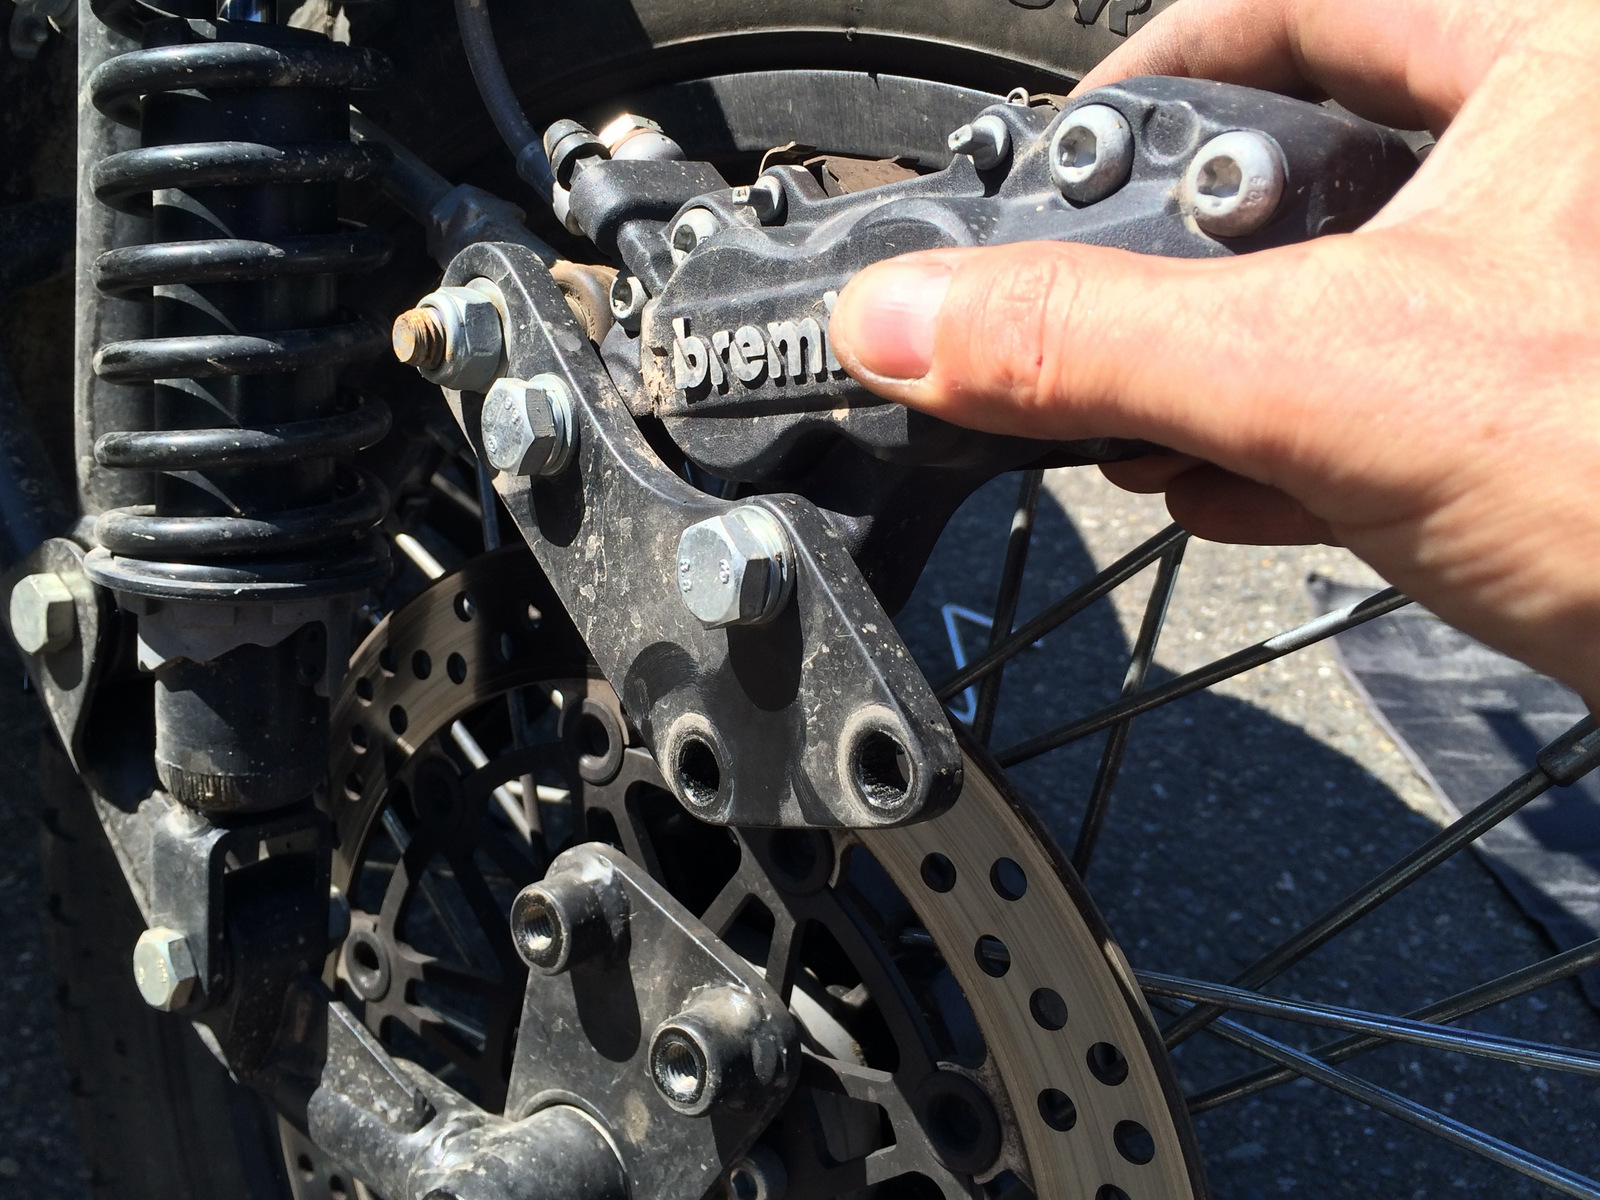
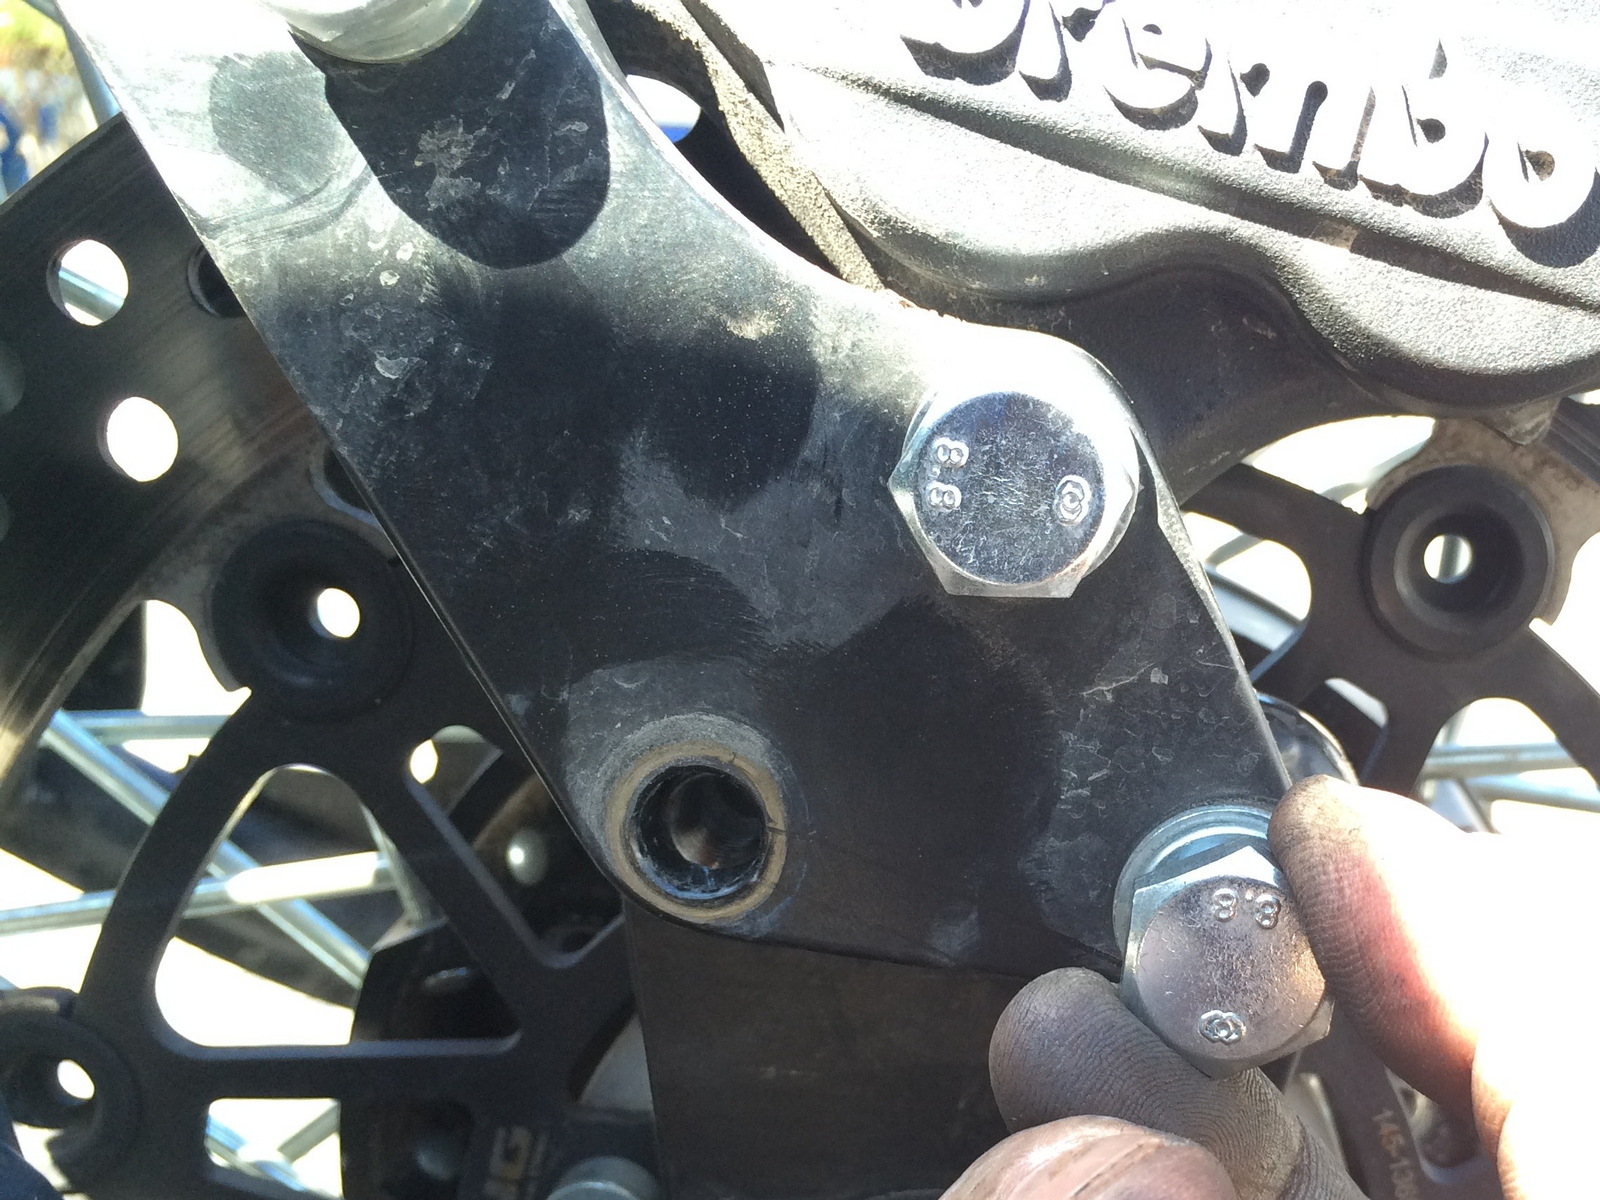
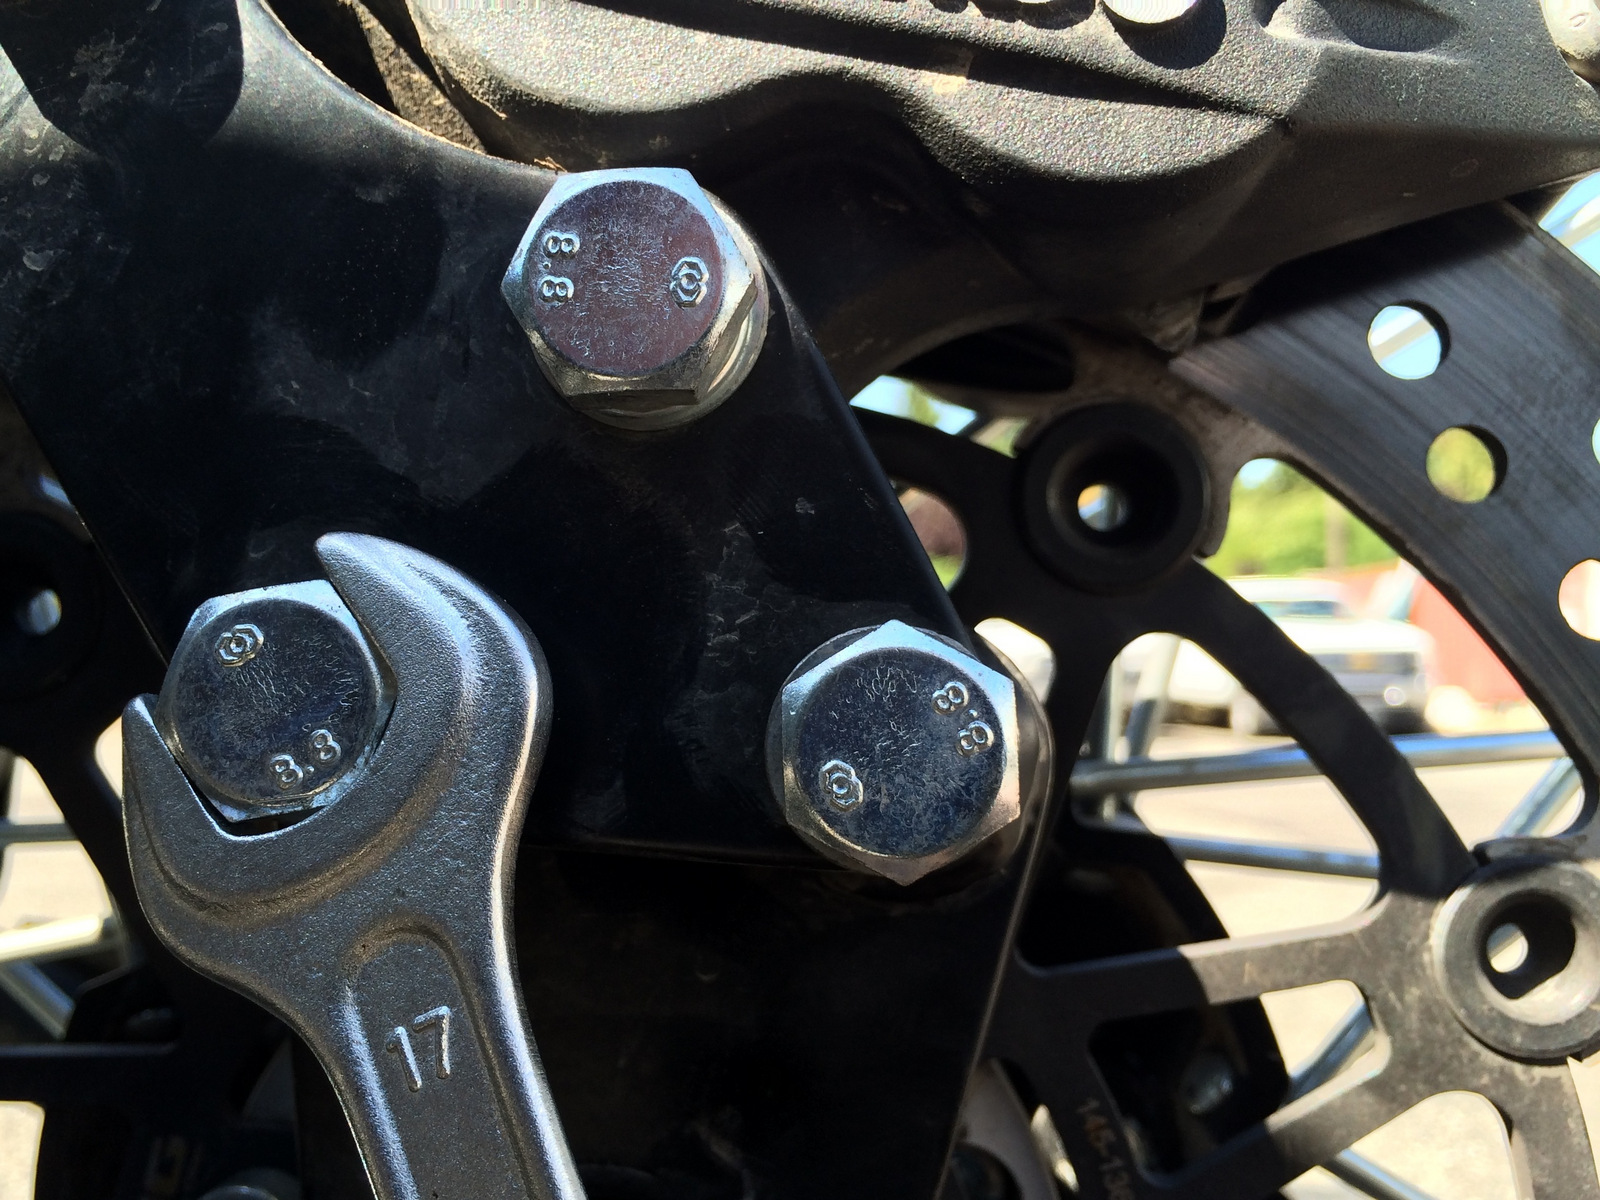
Step 2: Loosen and remove the two bolts securing the front brake caliper upper bracket to the lower caliper bracket with a 17mm tool.

WpwOrwPJpbG6iVSr

amKxAmEBBG1KNAMu


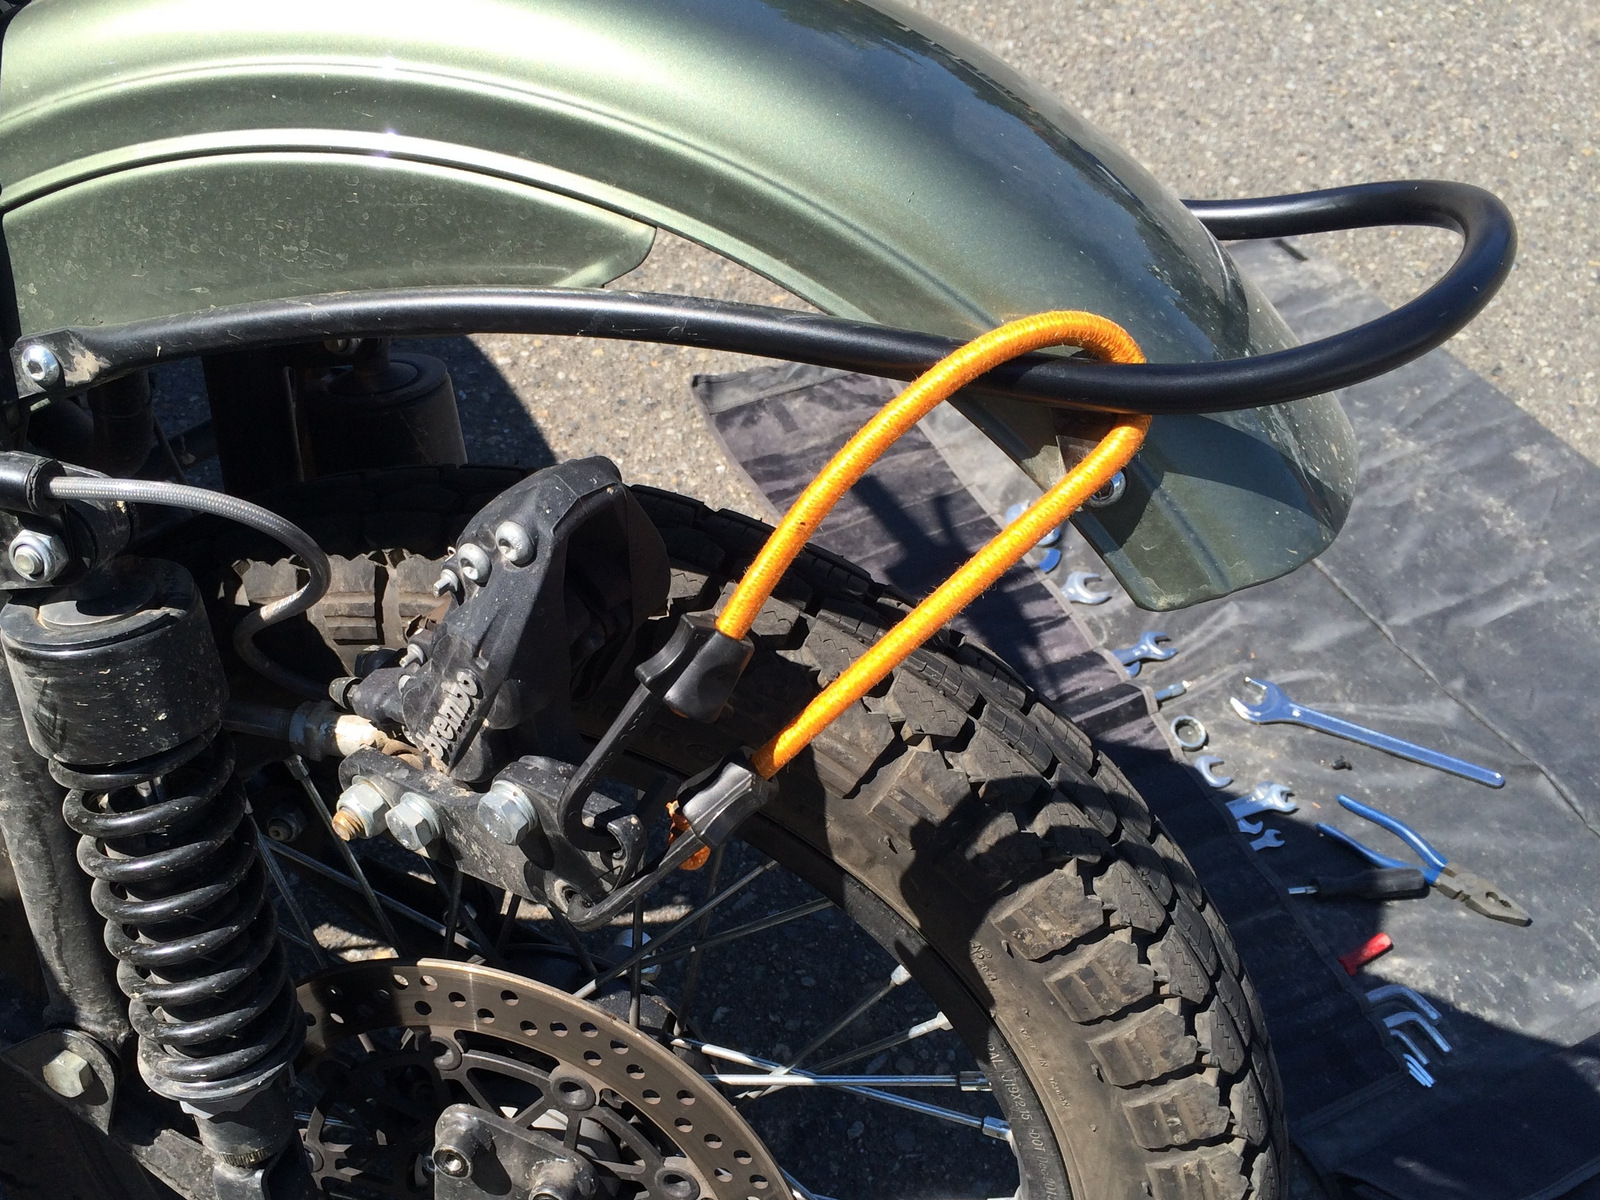
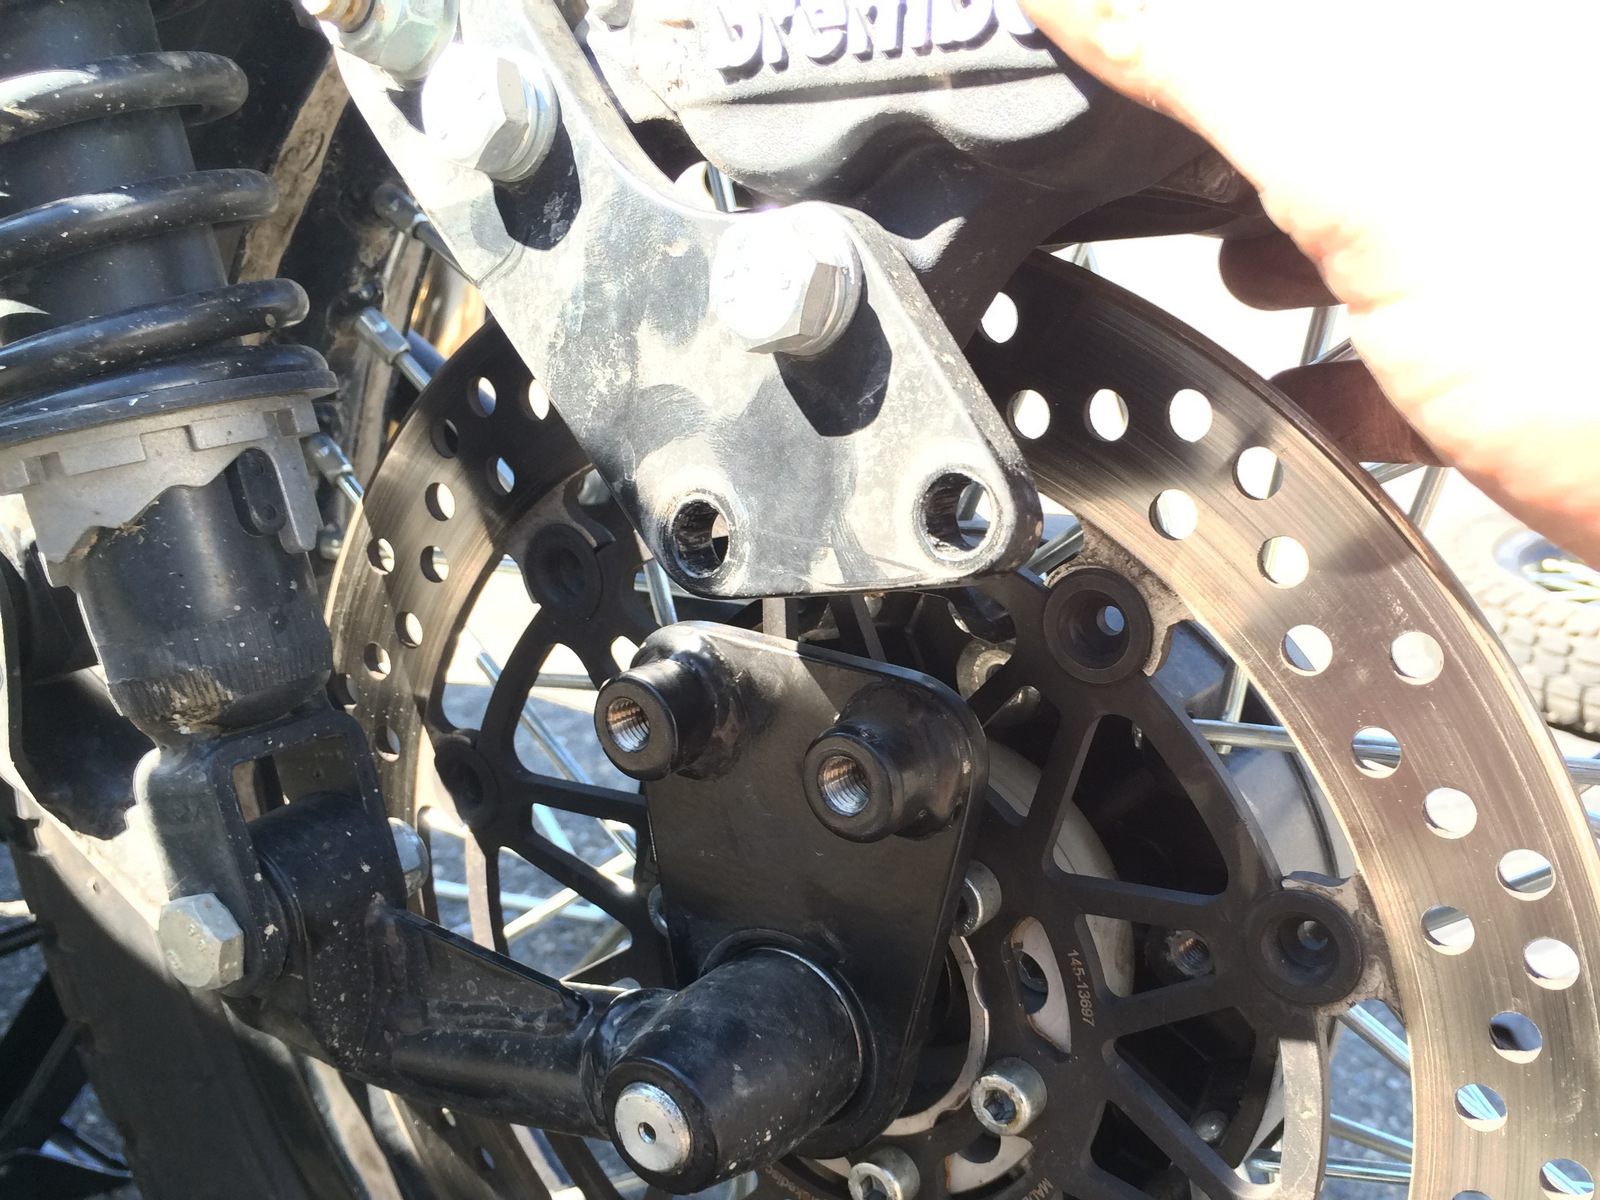
Step 3: Lift the front caliper up off the front rotor and suspend the front caliper from the front fender support with a zip tie, elastic cord or other suitable means.

Q2LStrGvYDcq4f6bNote: We have pre-assembled all components and included necessary hardware when required to assure proper alignment between the caliper and rotor.
If shims and/or spacers are present when loosening the front brake caliper from the caliper mounting bracket, the shims and/or spacers will need to be re-installed in the exact same location as they were removed. Take note of shim and/or spacer placement. DO NOT DISCARD!

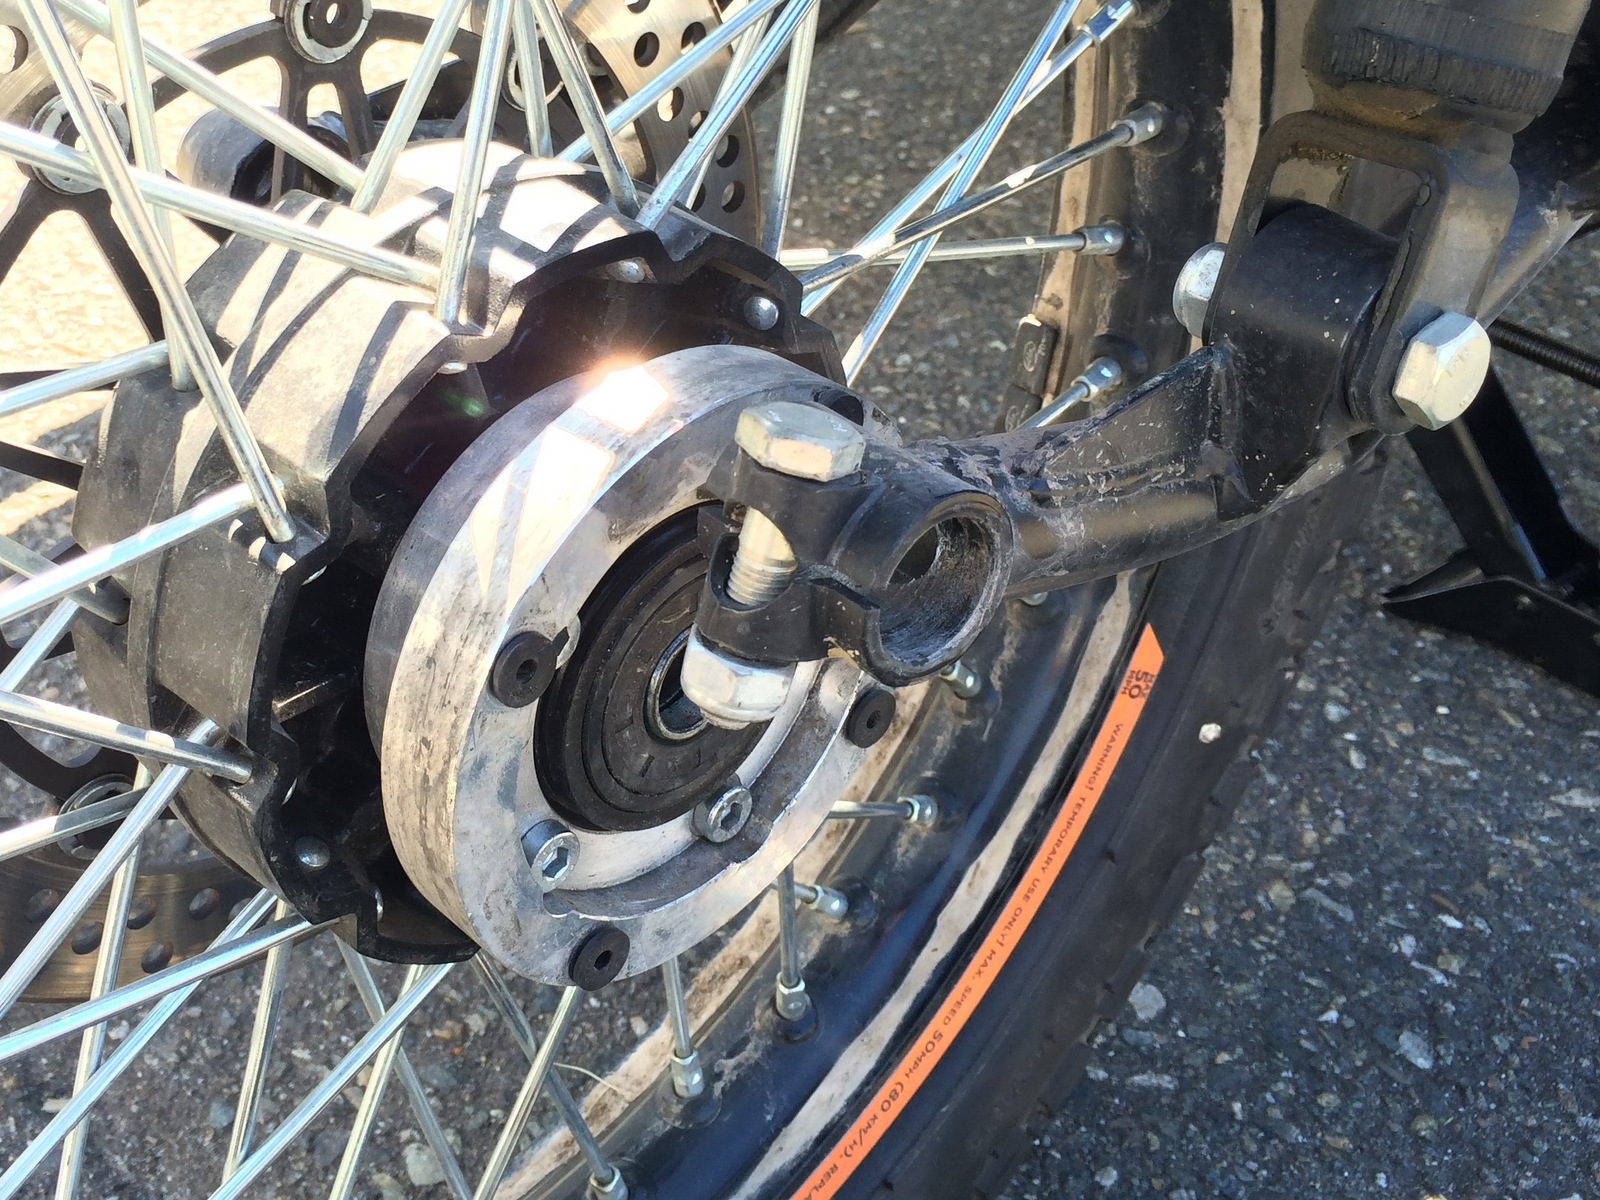
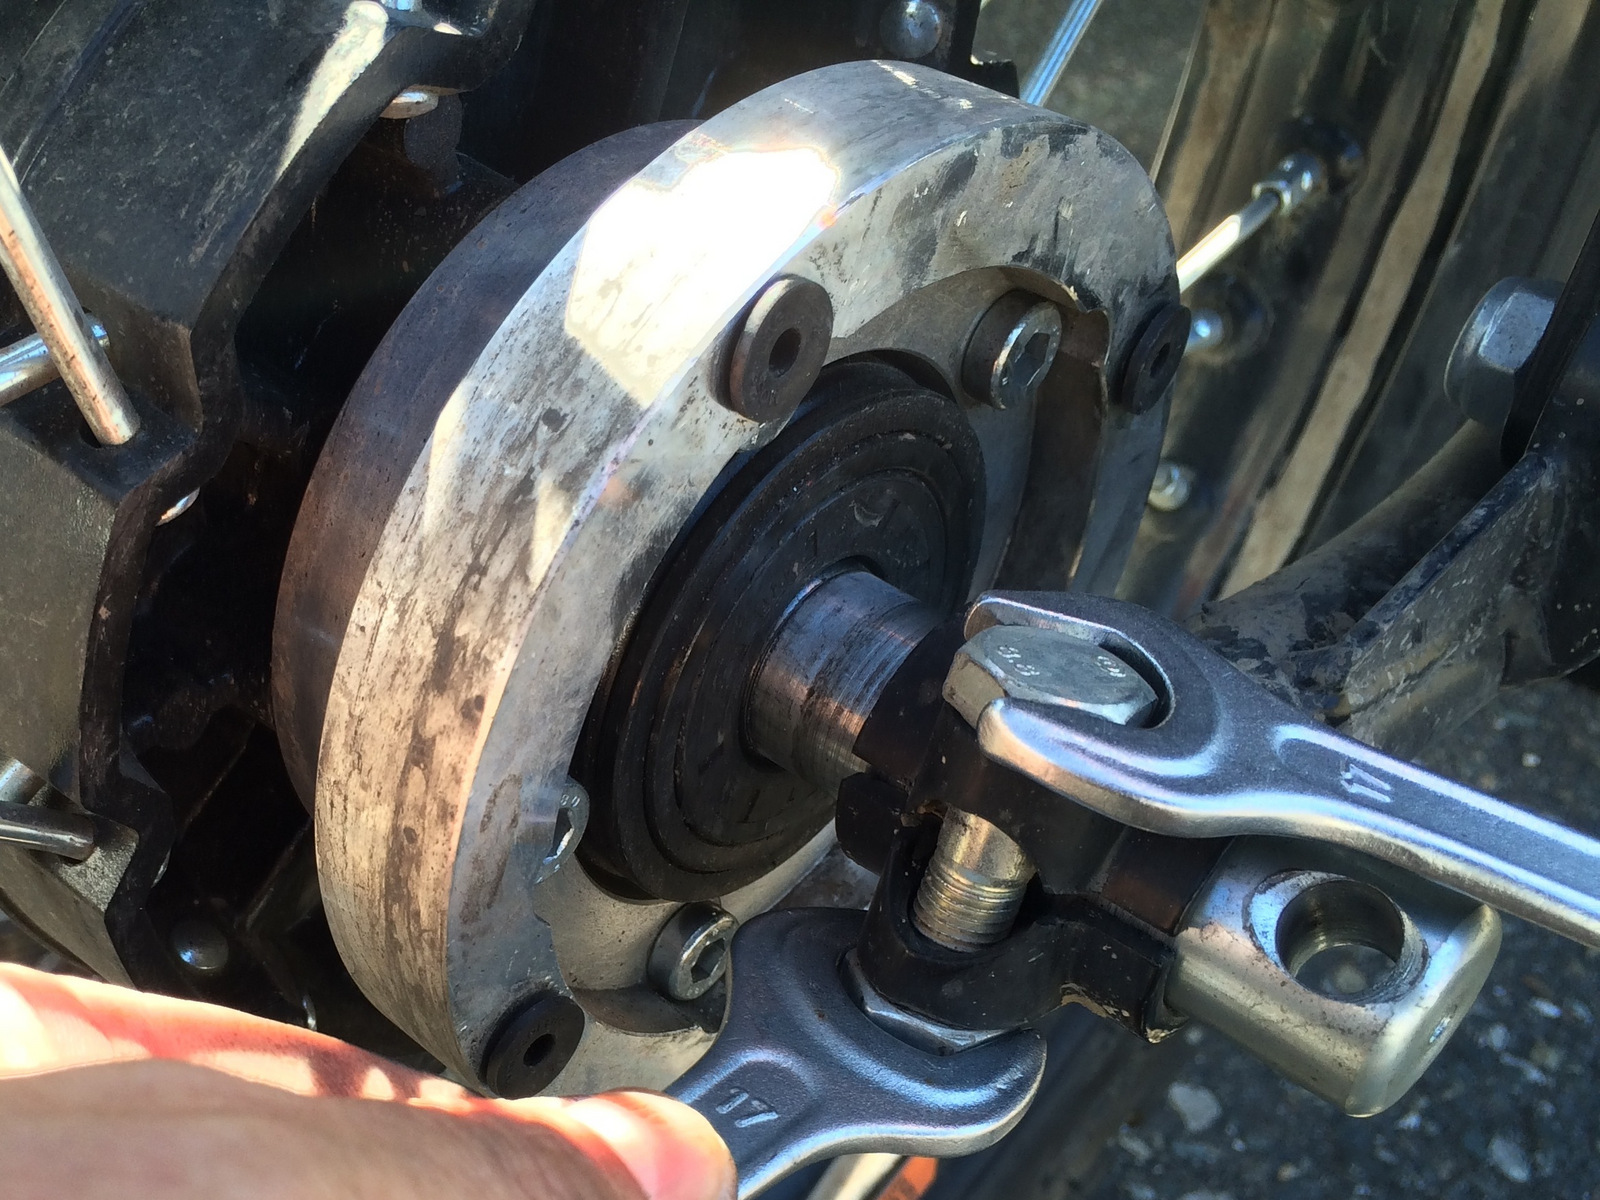
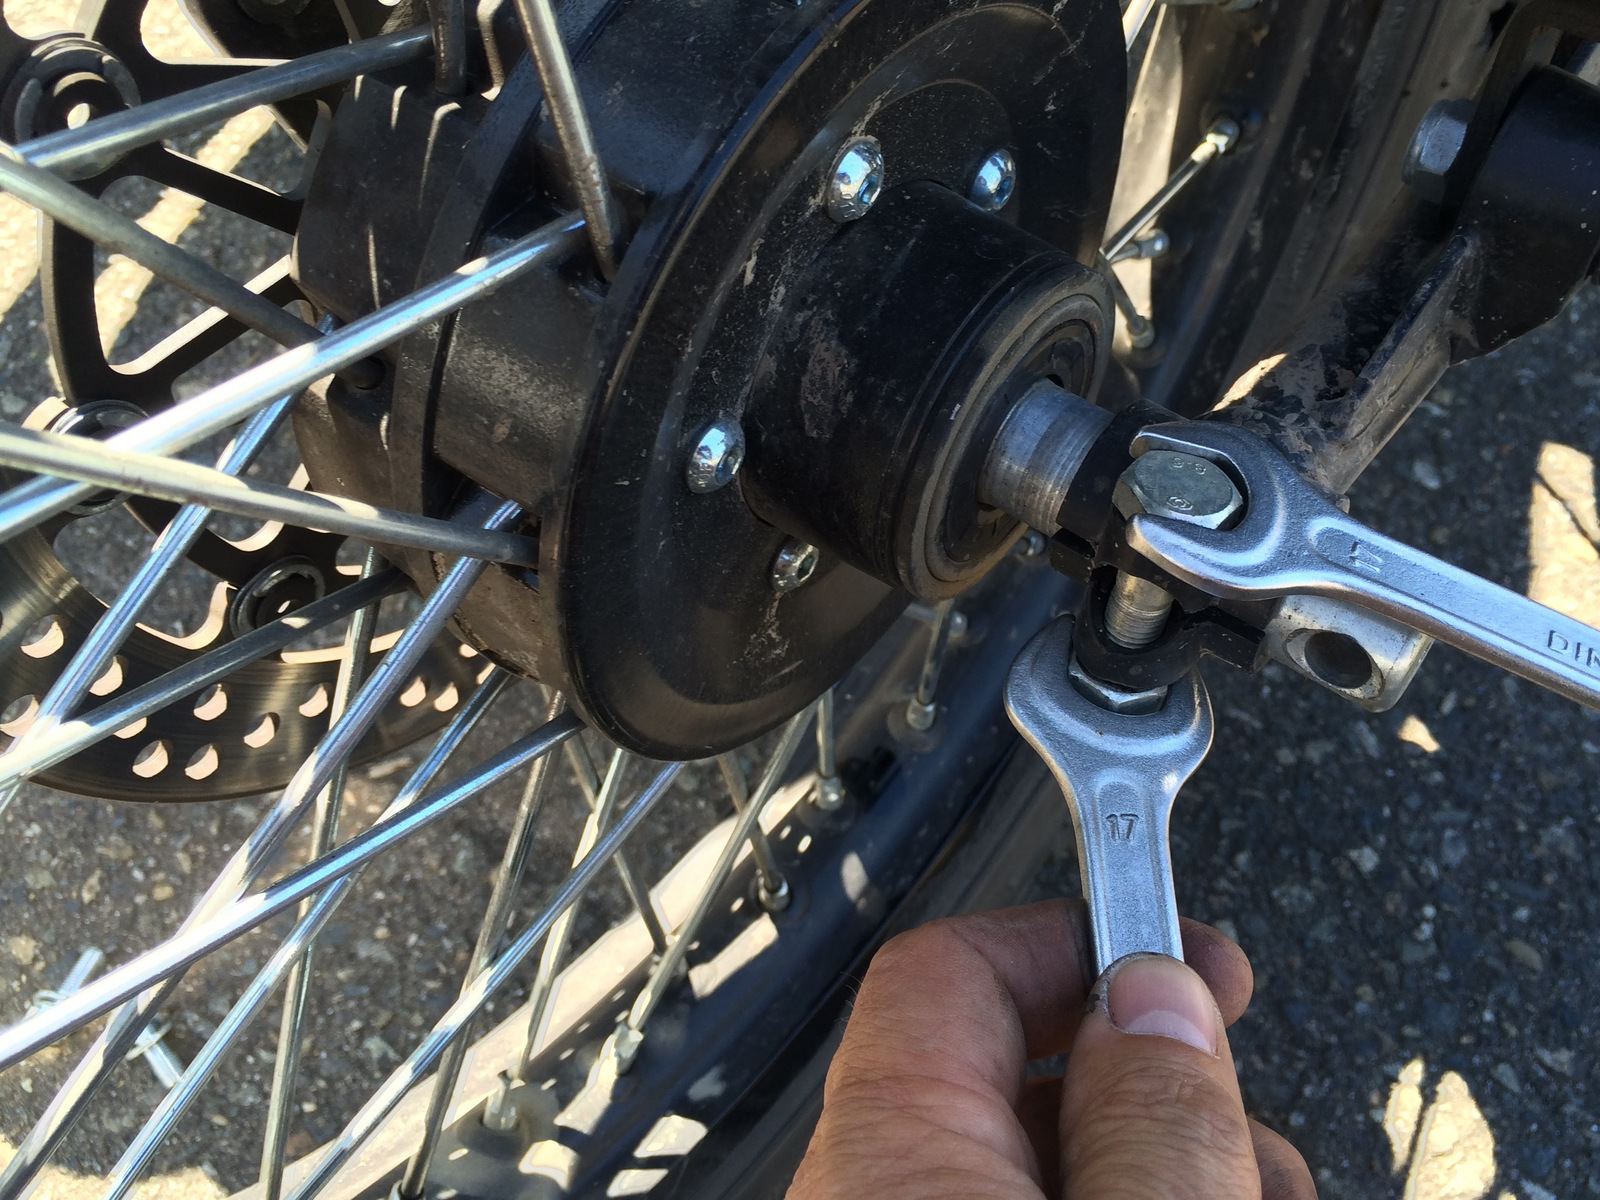
Step 4: Loosen the front axle pinch bolt on the left side of the front swing arm using two (2) 17mm tools.

KWLPSNJstmQuL6my


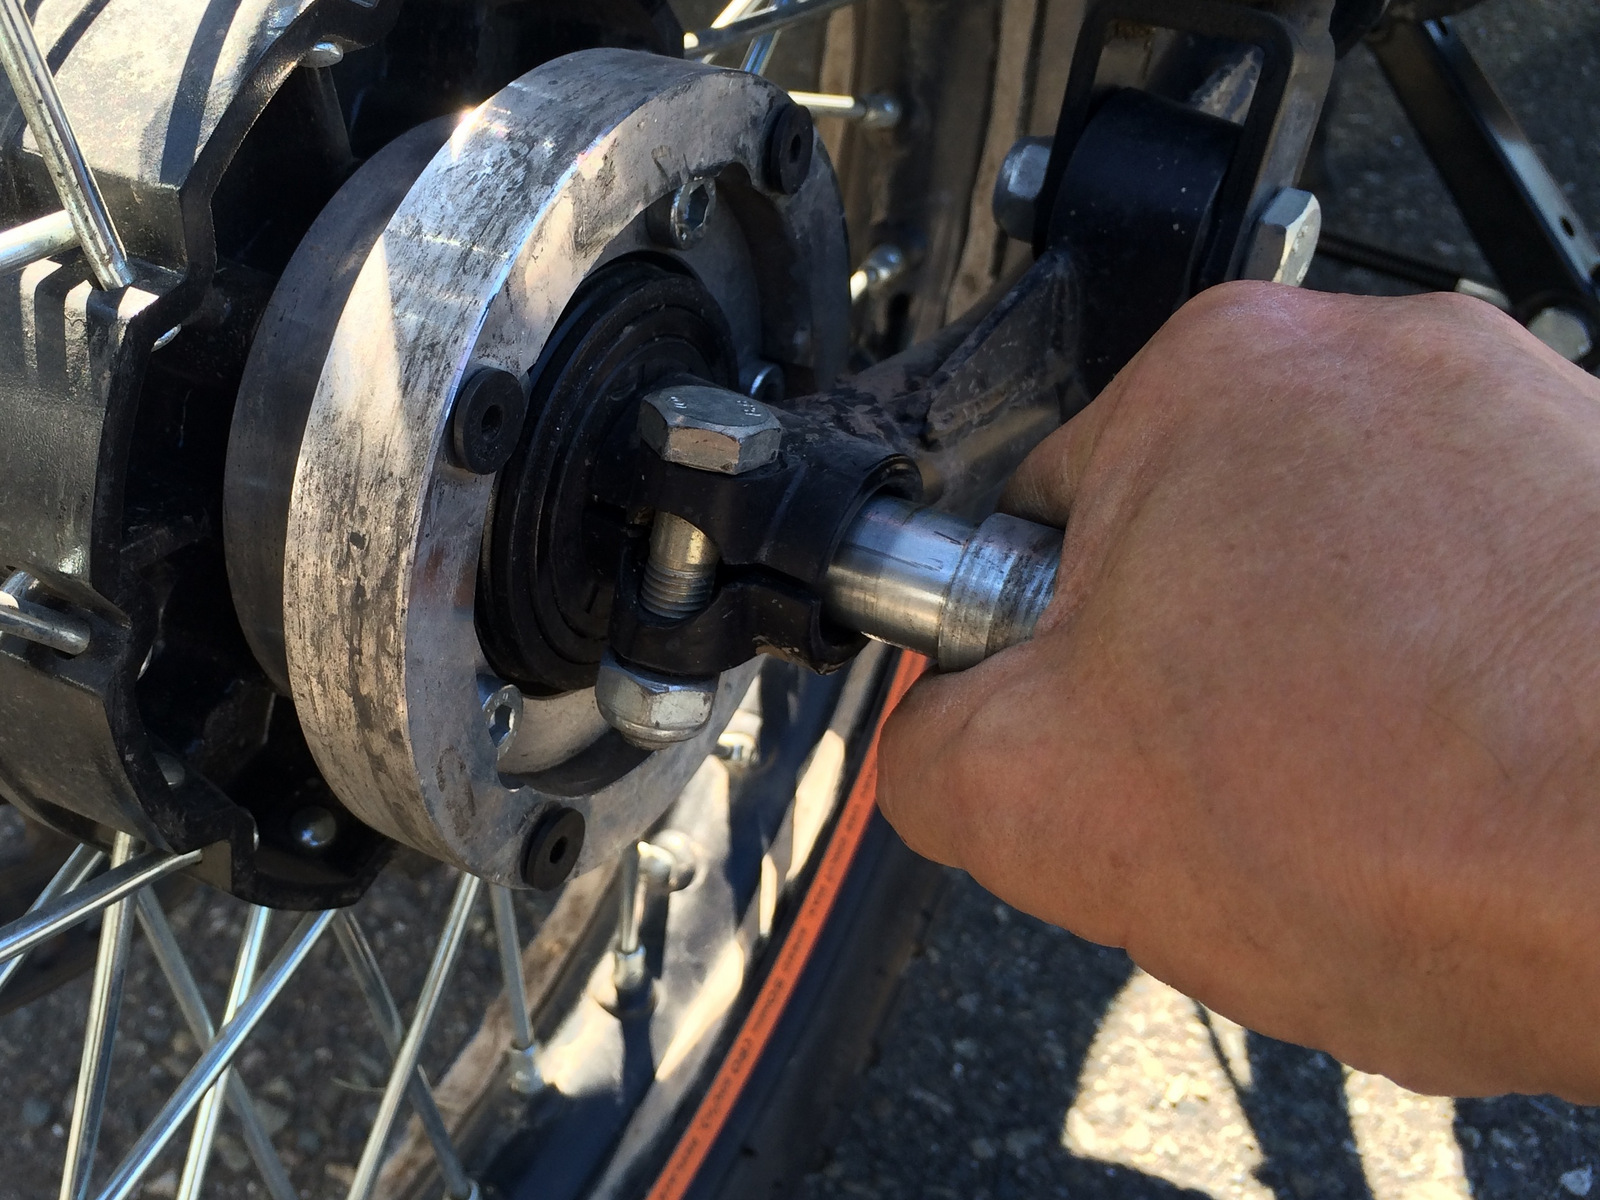
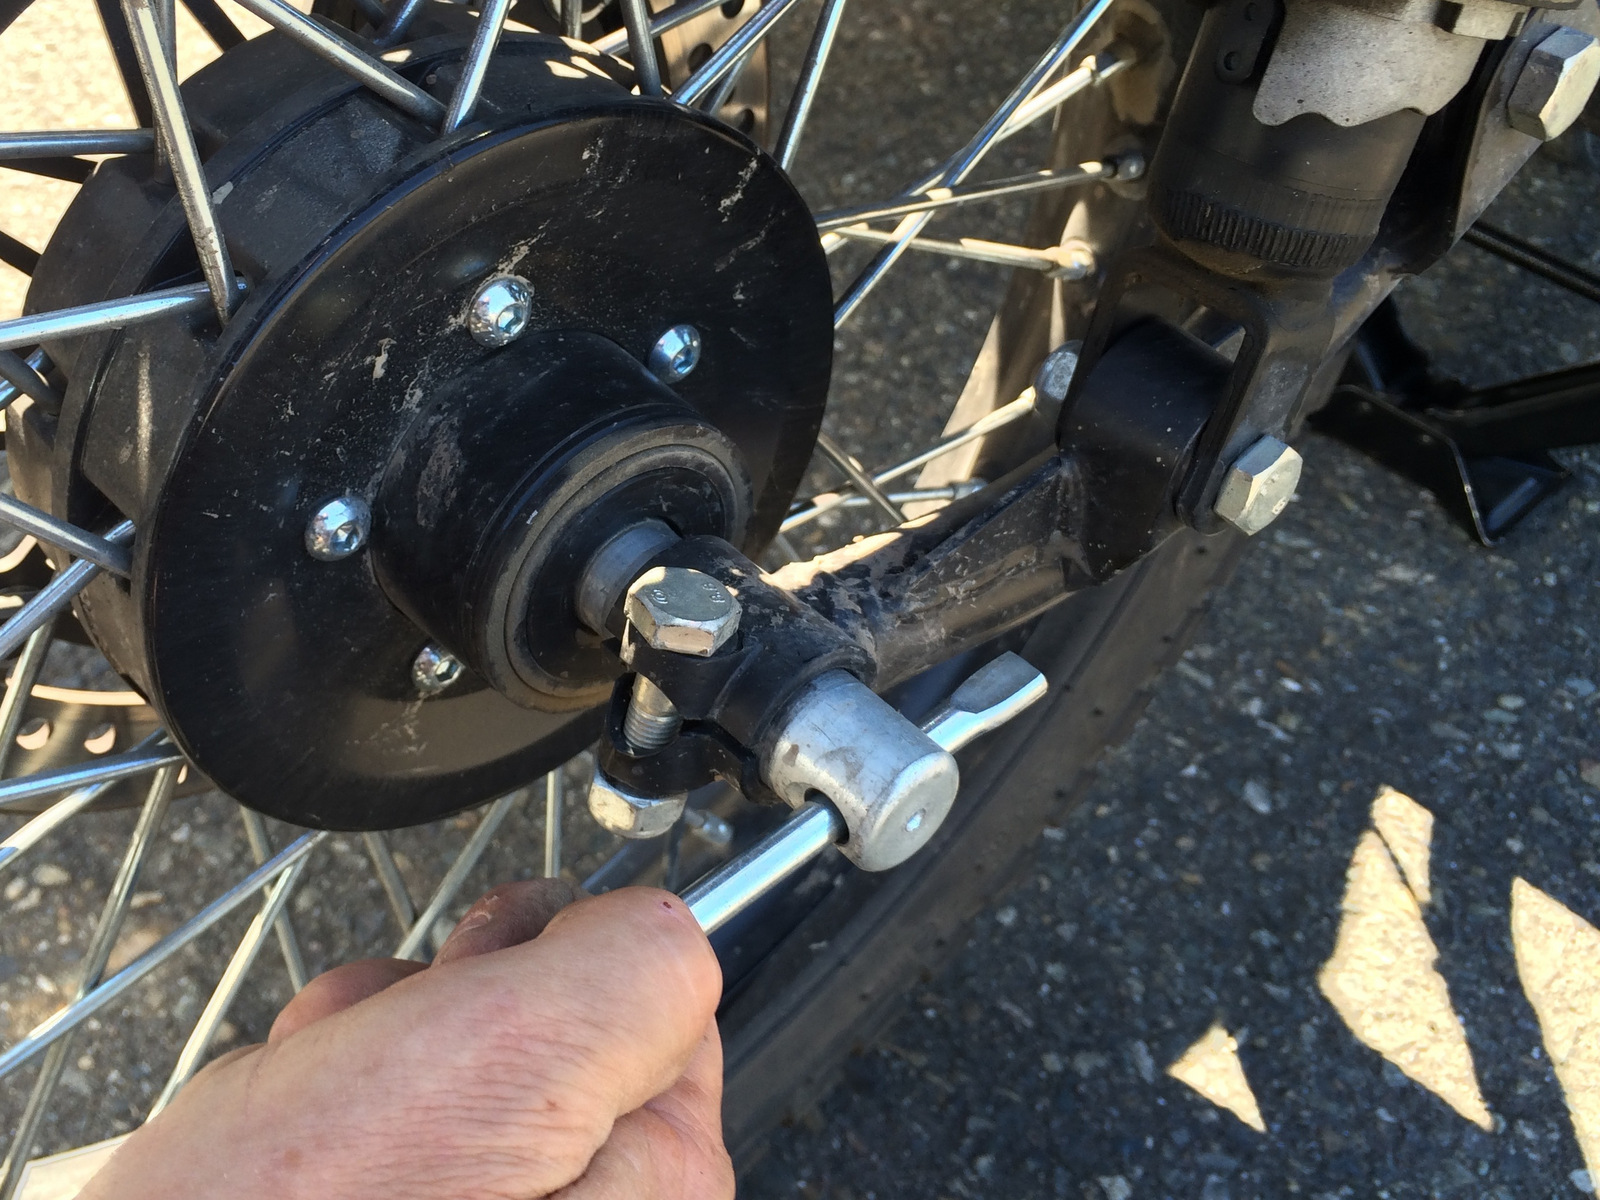
Step 5: Insert a suitable tool (screwdriver works well) into the hole on the left side of the axle and turn clockwise to loosen the axle from the front swing arm.

HPYmVsb5rAM5NvSR


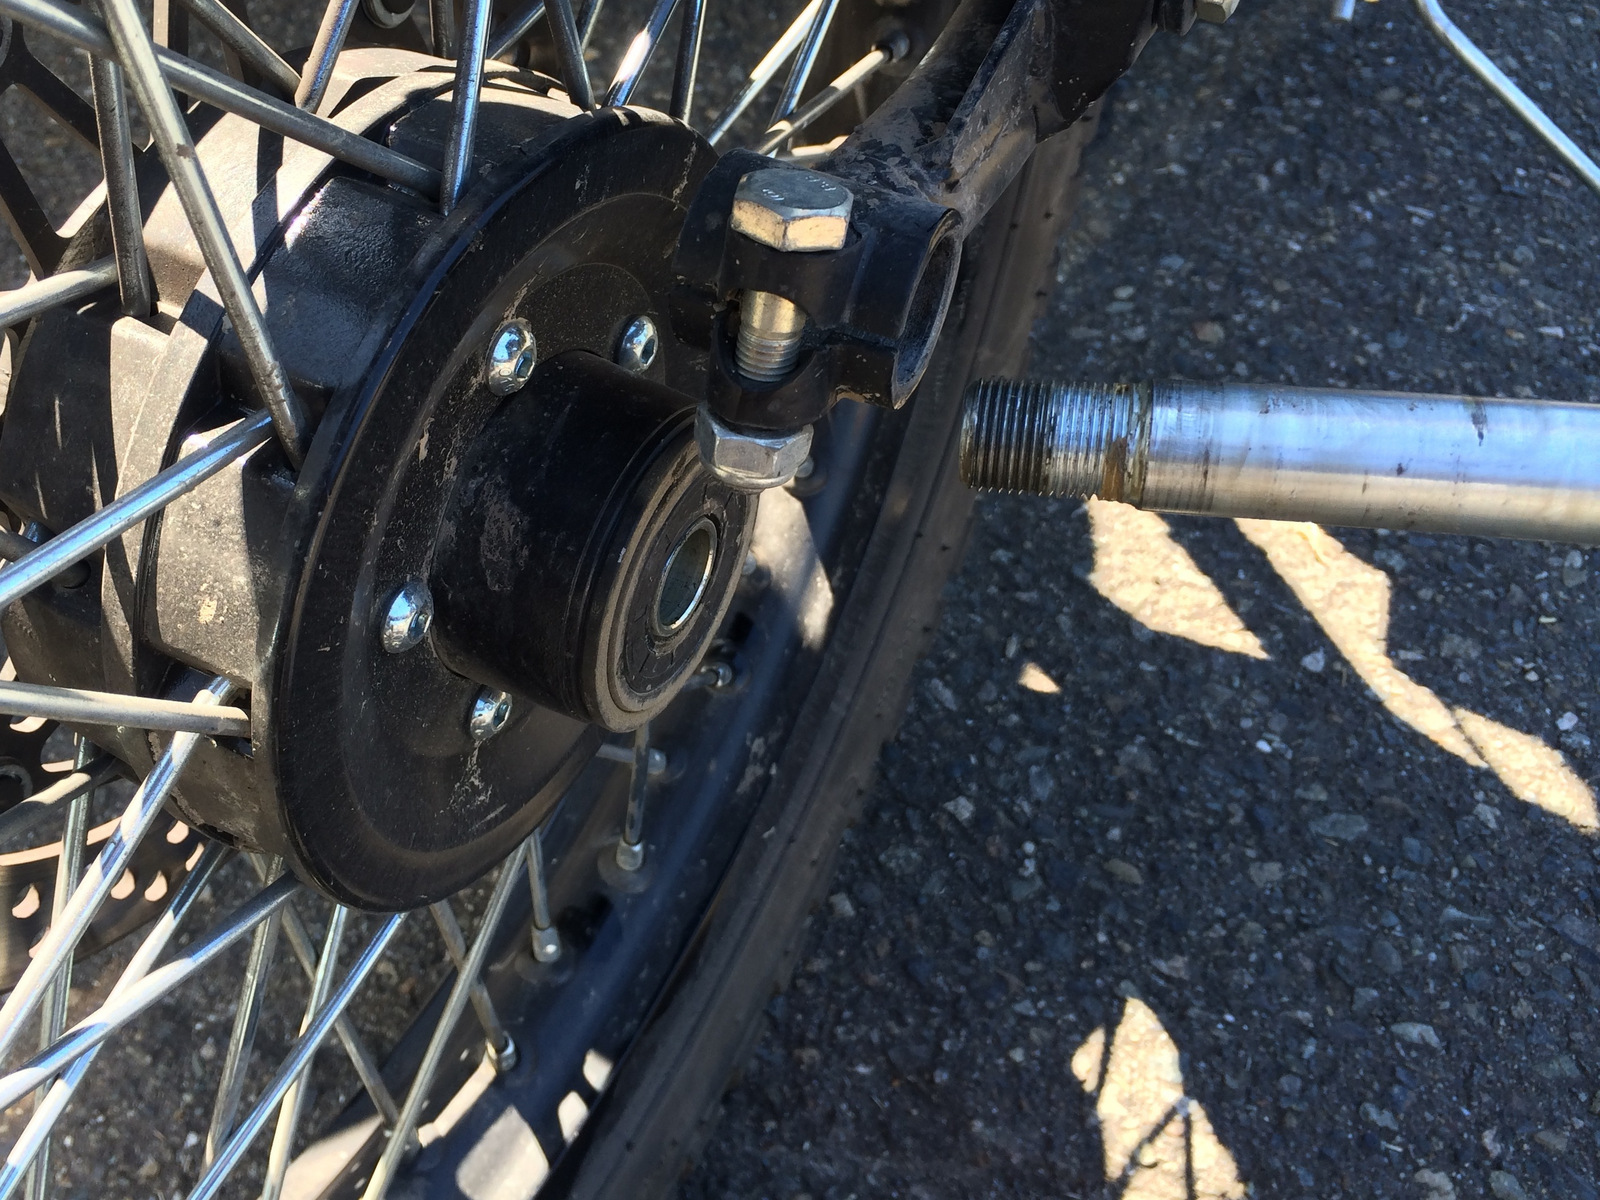
Step 6: Remove the axle.

pCLLGW2tGBpS4QsN

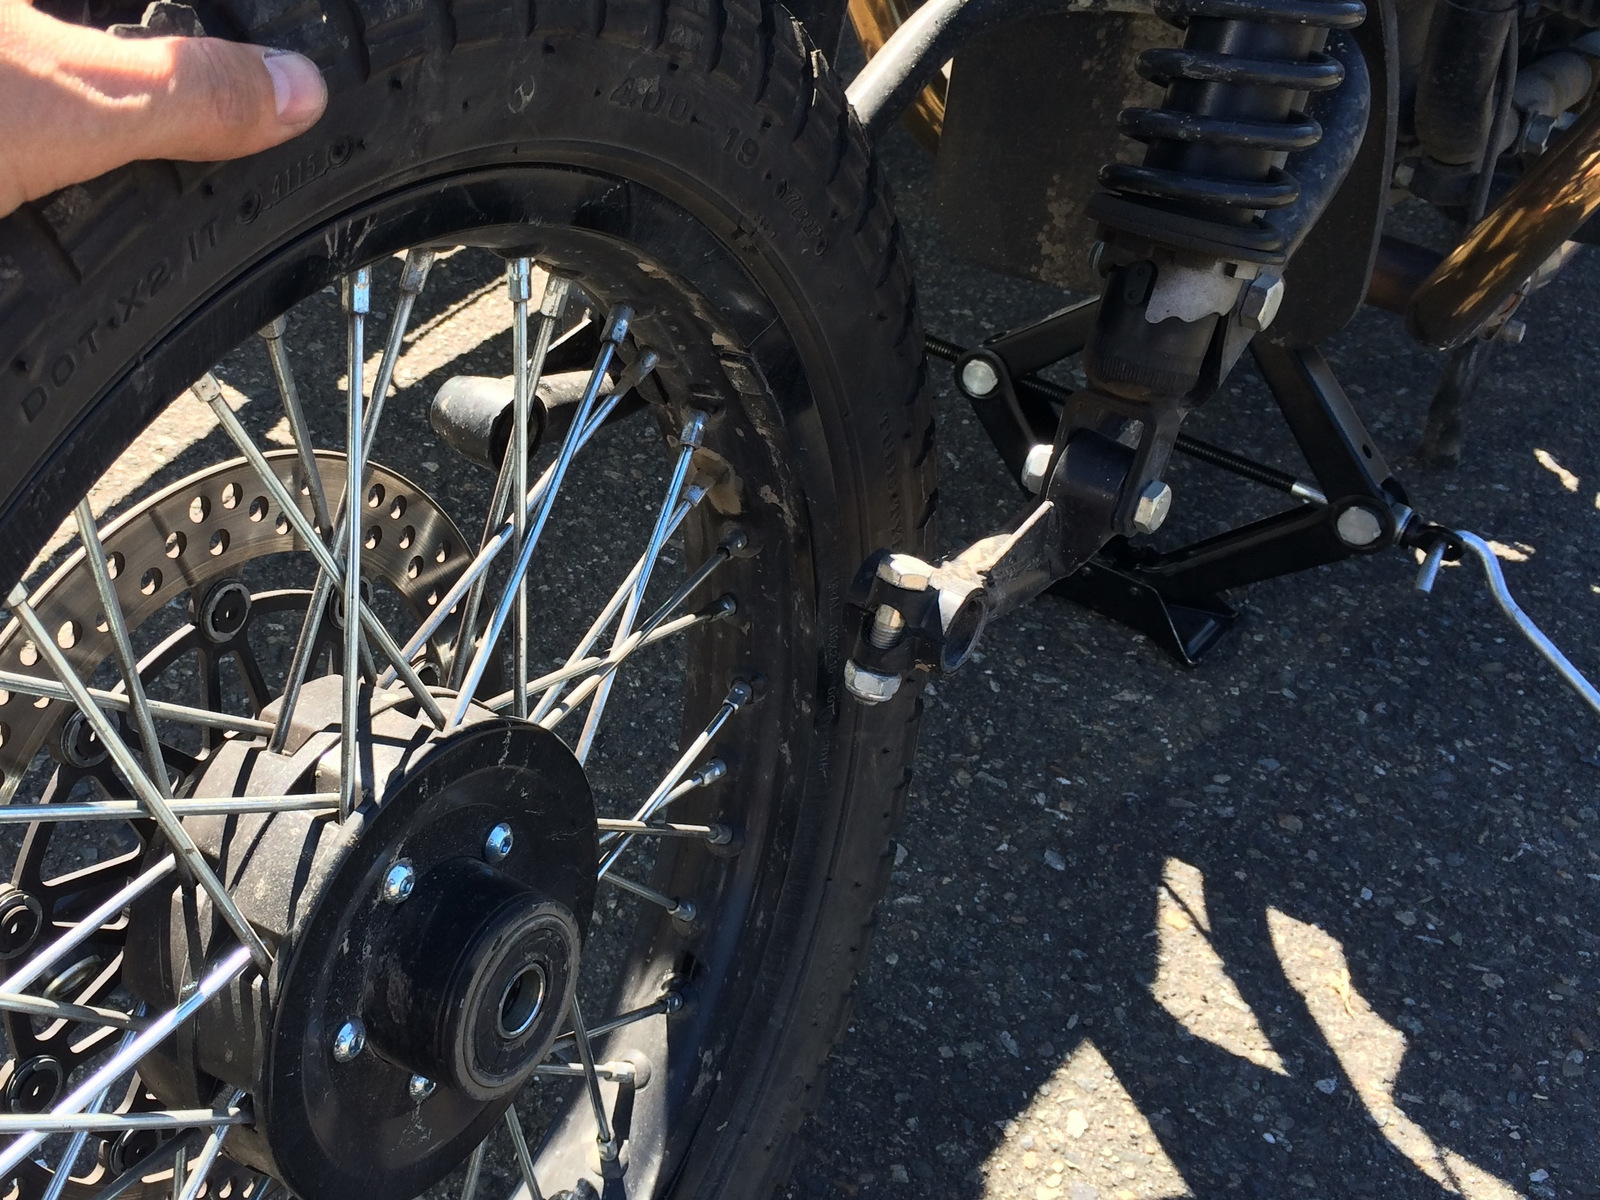
Step 7: Remove the front wheel assembly.

EliERDCsW5CbTSAC

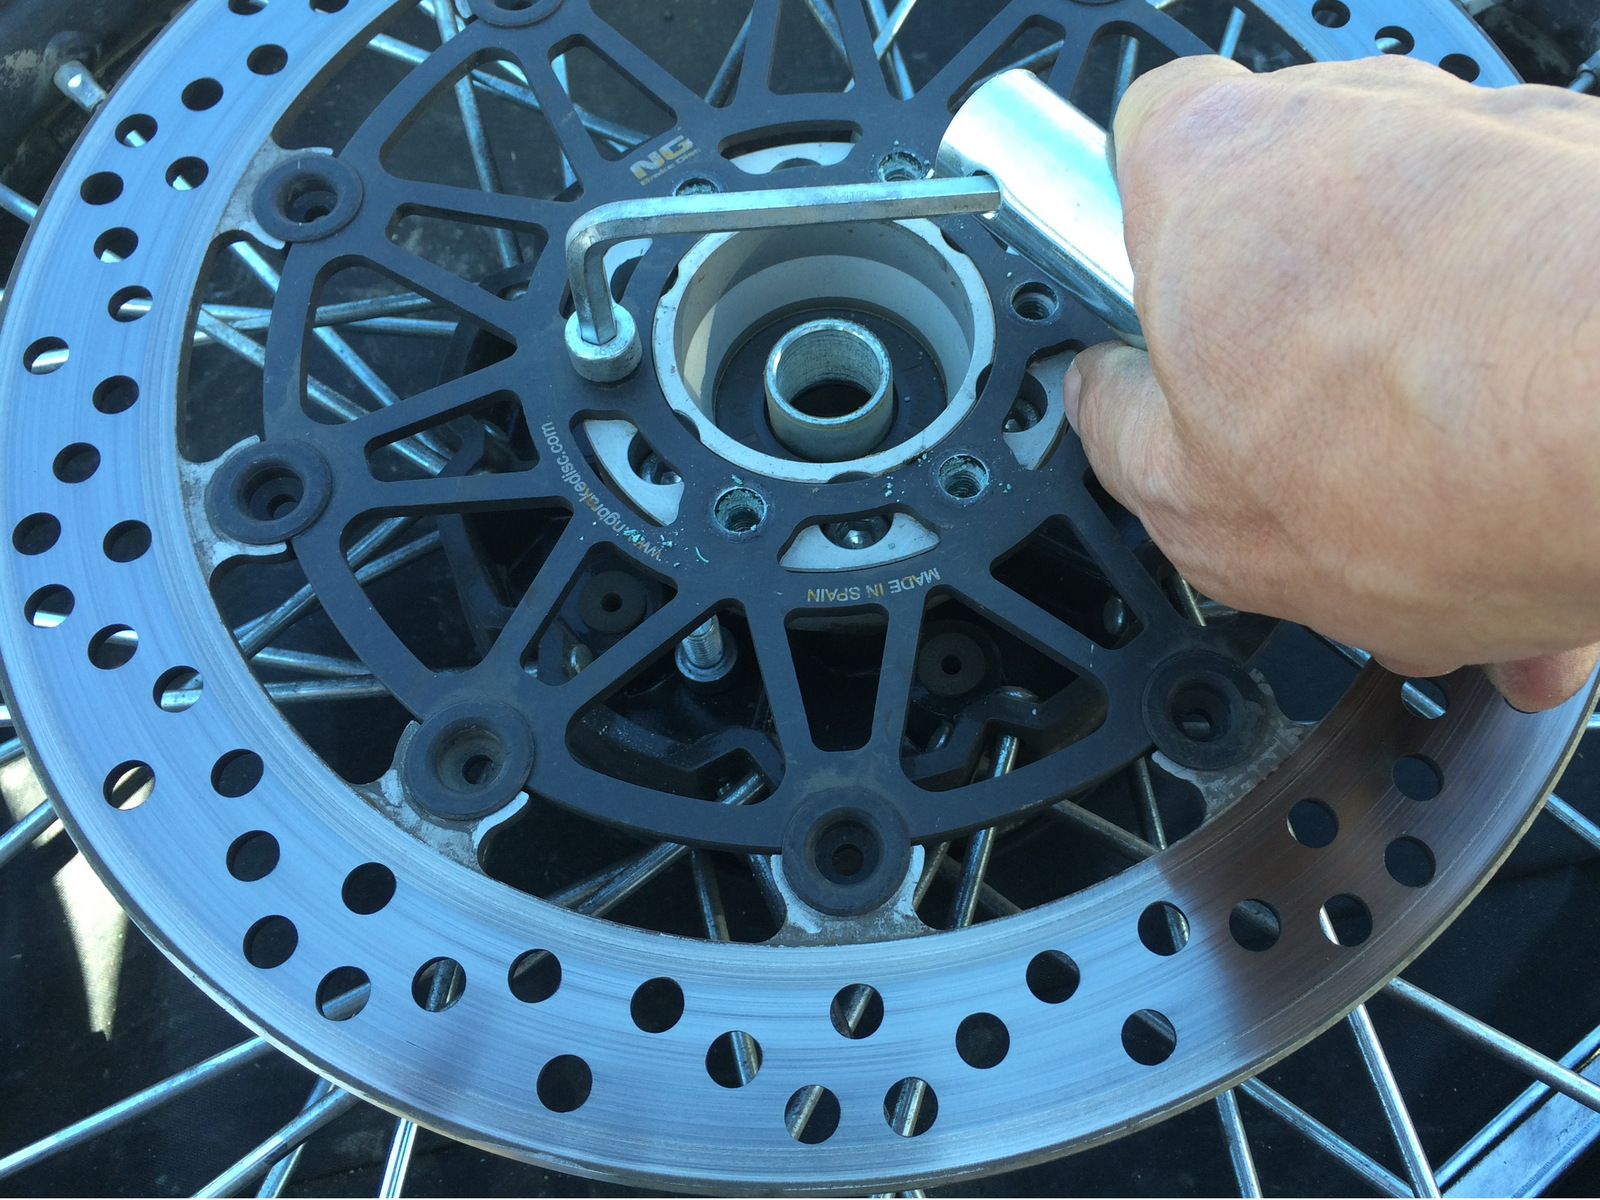
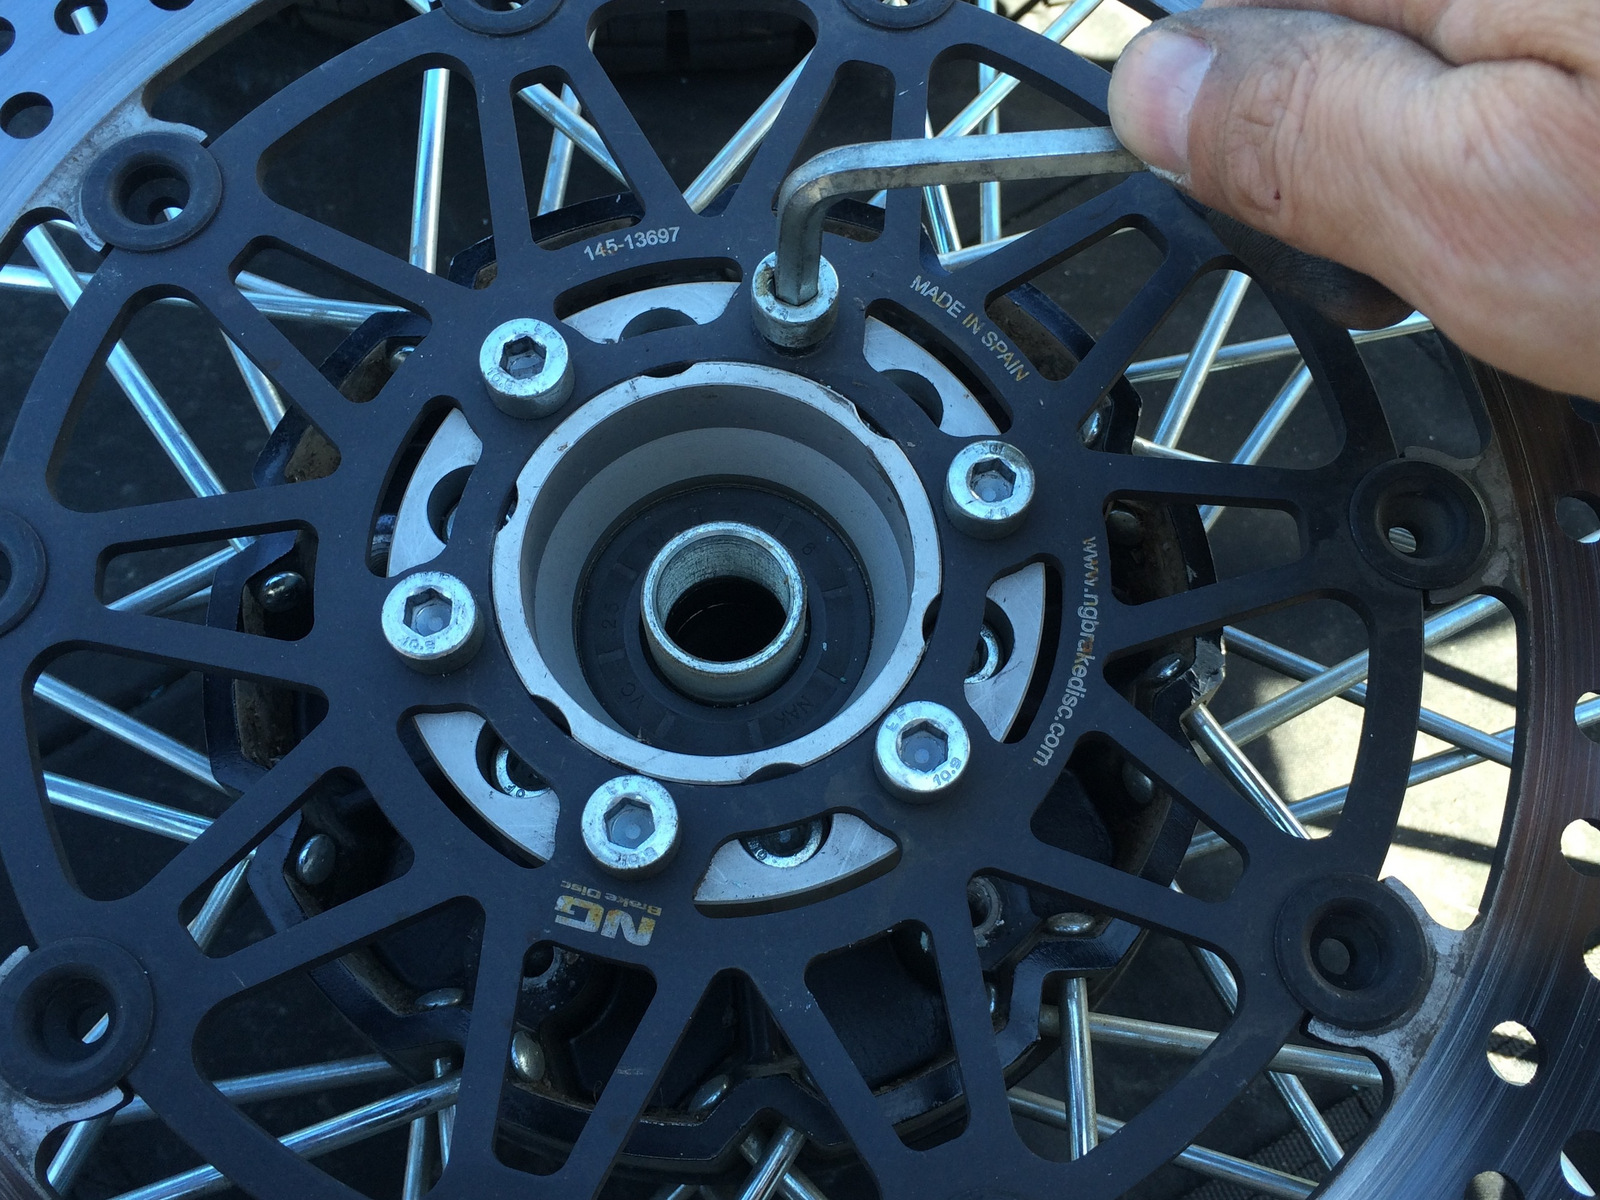
Step 8: Remove the six (6) socket head cap screws retaining the front rotor to the front rotor spacer using a 6mm tool.

JnZtQPOGOZ6rS4eZ

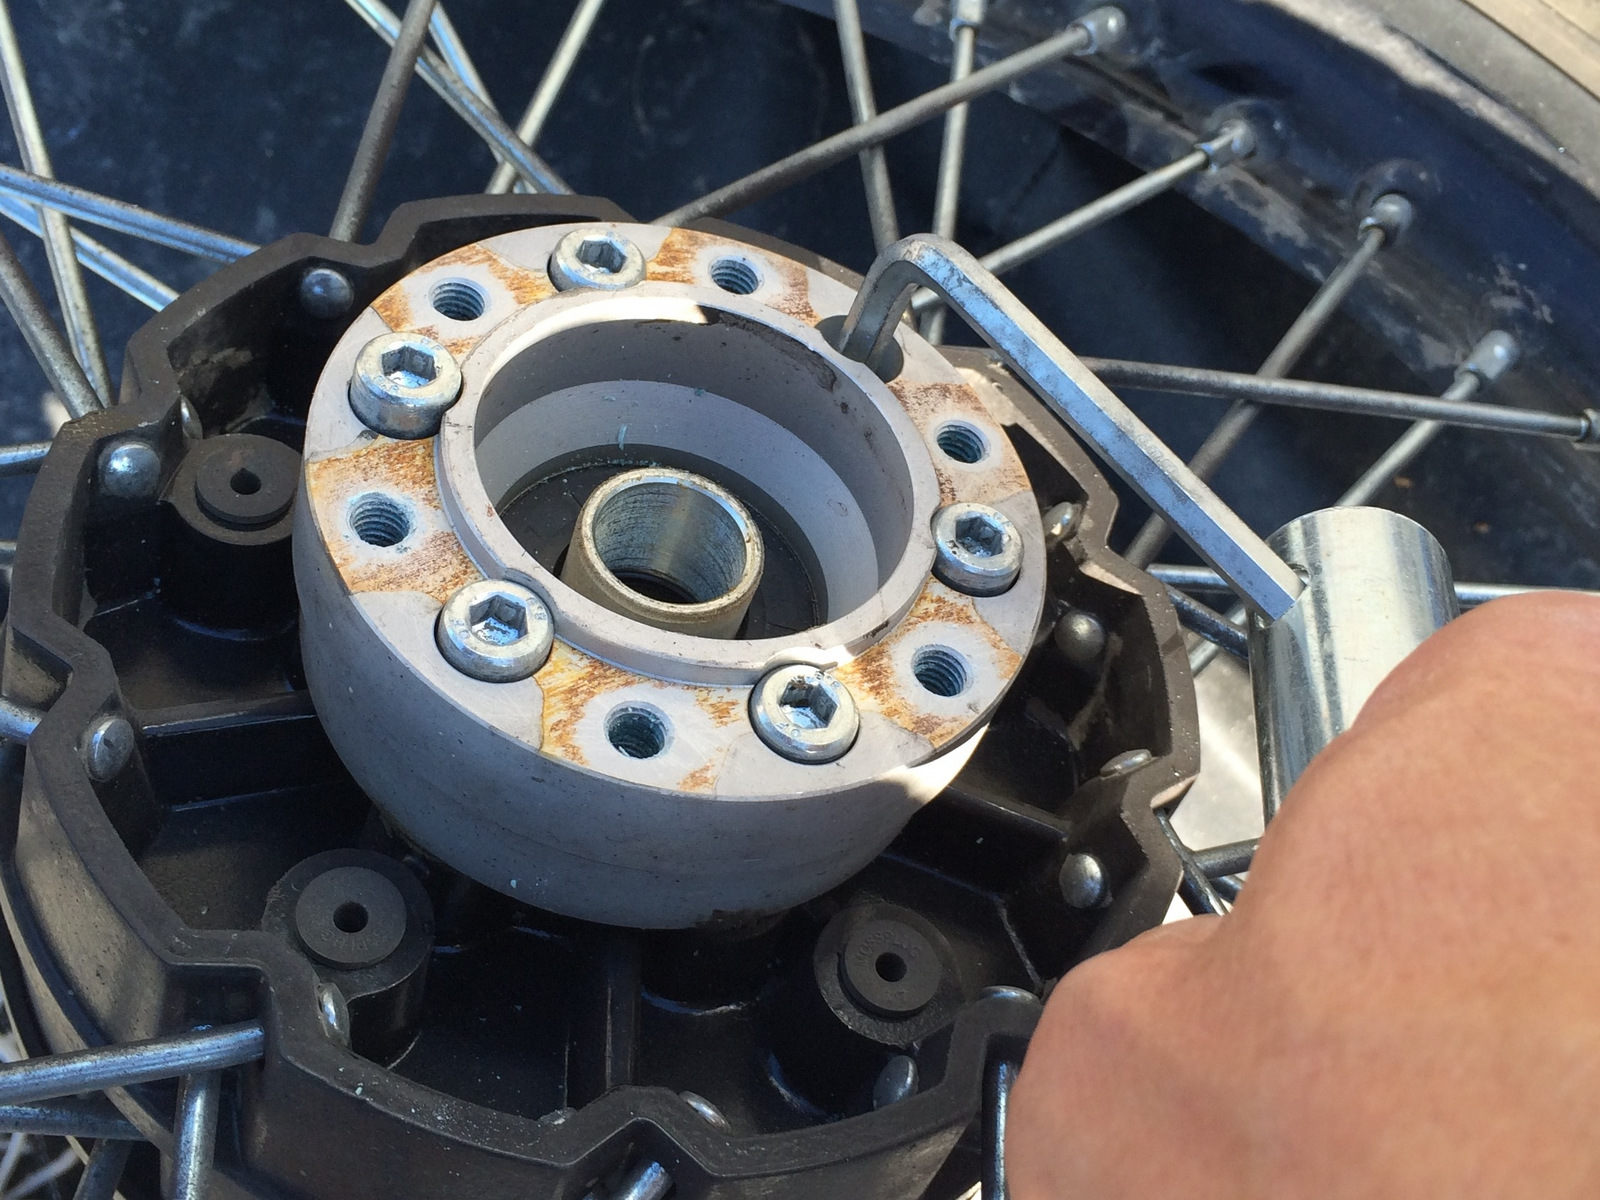
Step 9: Remove the six (6) socket head cap screws retaining the front rotor spacer to the front hub.

OVGpnKgAmvADerDg

When the stock front wheel assembly is repaired be sure to tap and clean all threaded mounting holes and hardware threads of old thread locking compound and apply new medium strength thread locking compound on all rotor hardware.

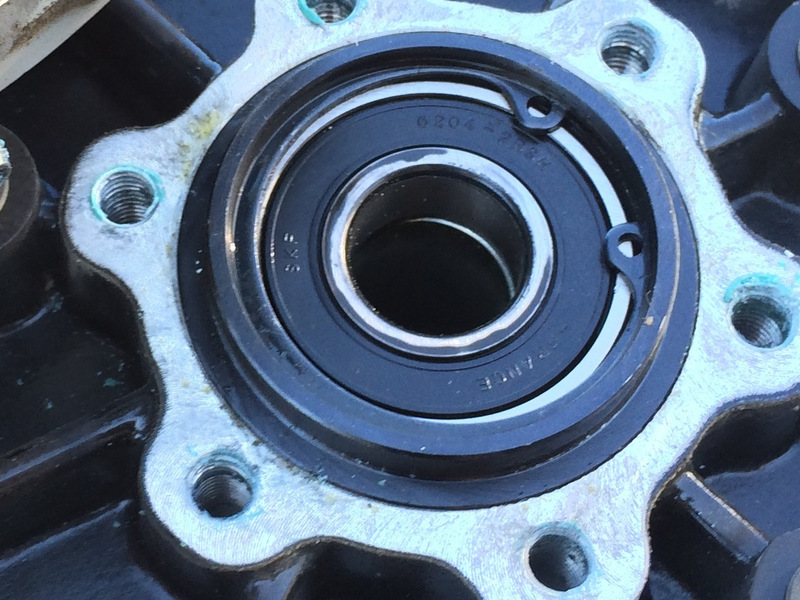
Step 10: Remove the right side front hub retaining circlip using the small screwdriver found in the toolkit or other suitable tool.

3qFRyjZMsNwtcb2R

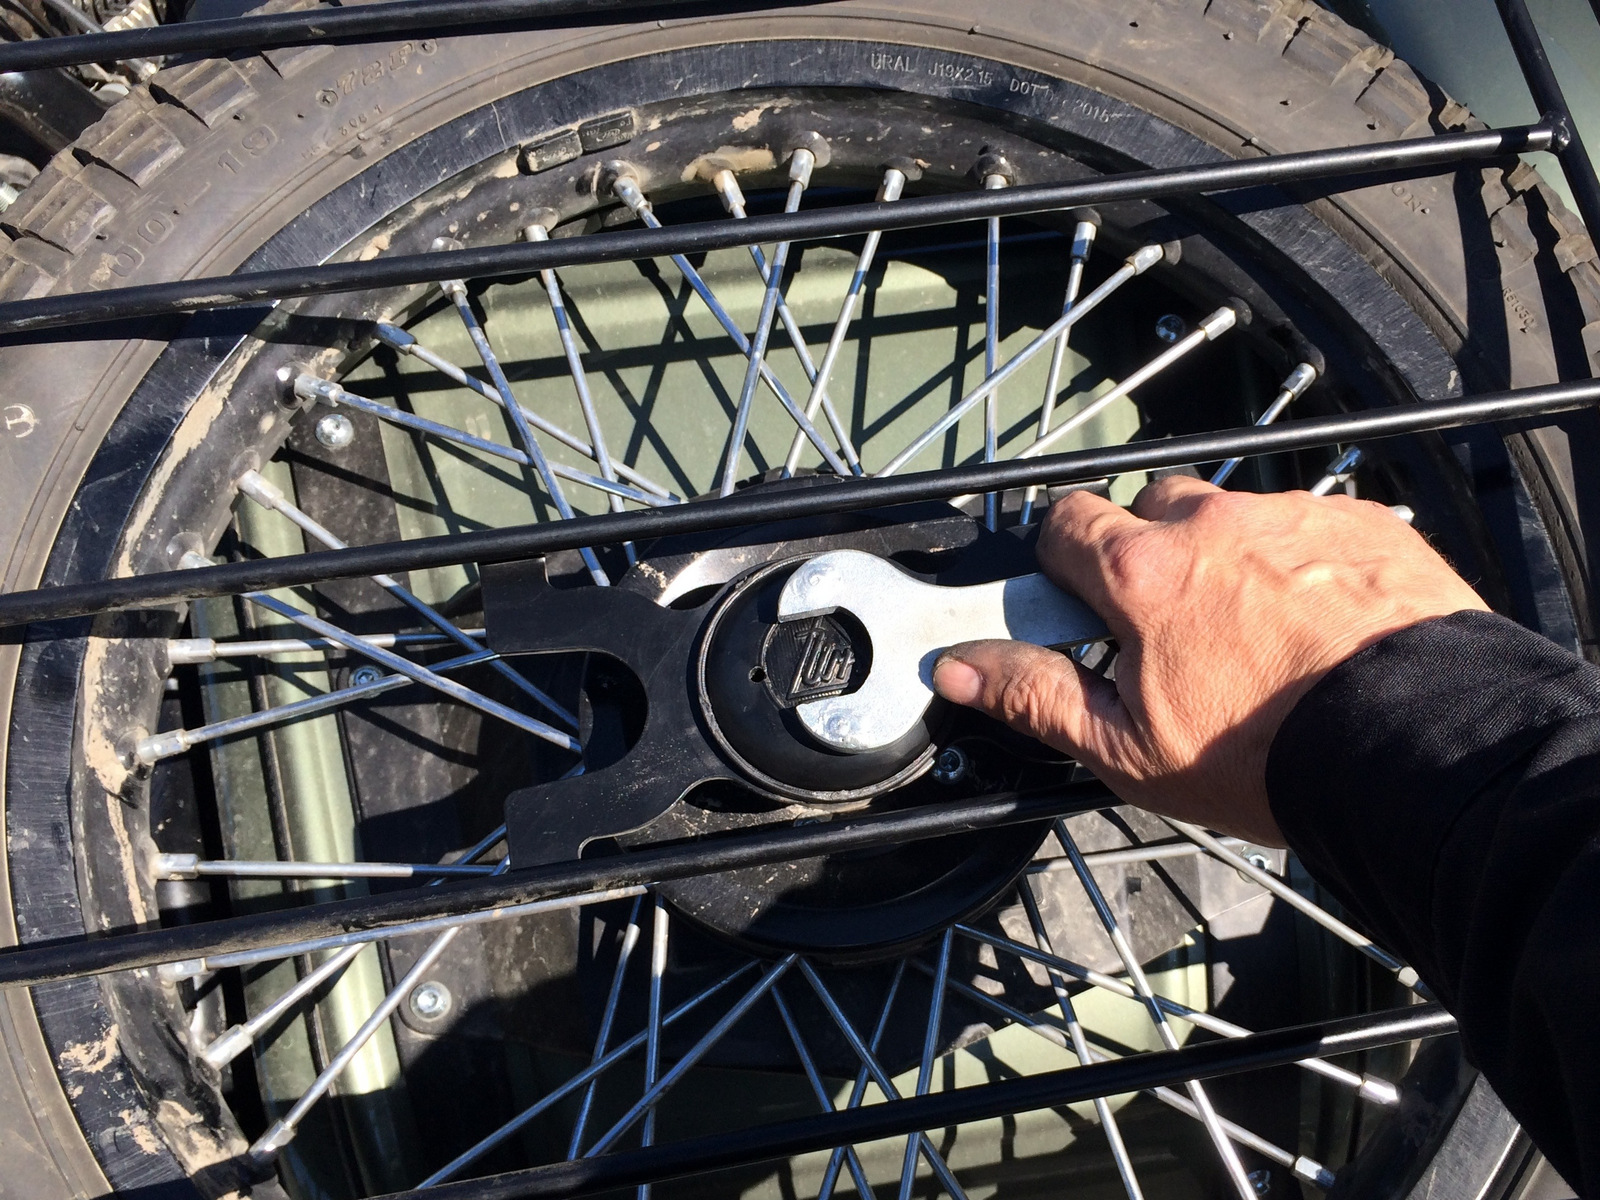
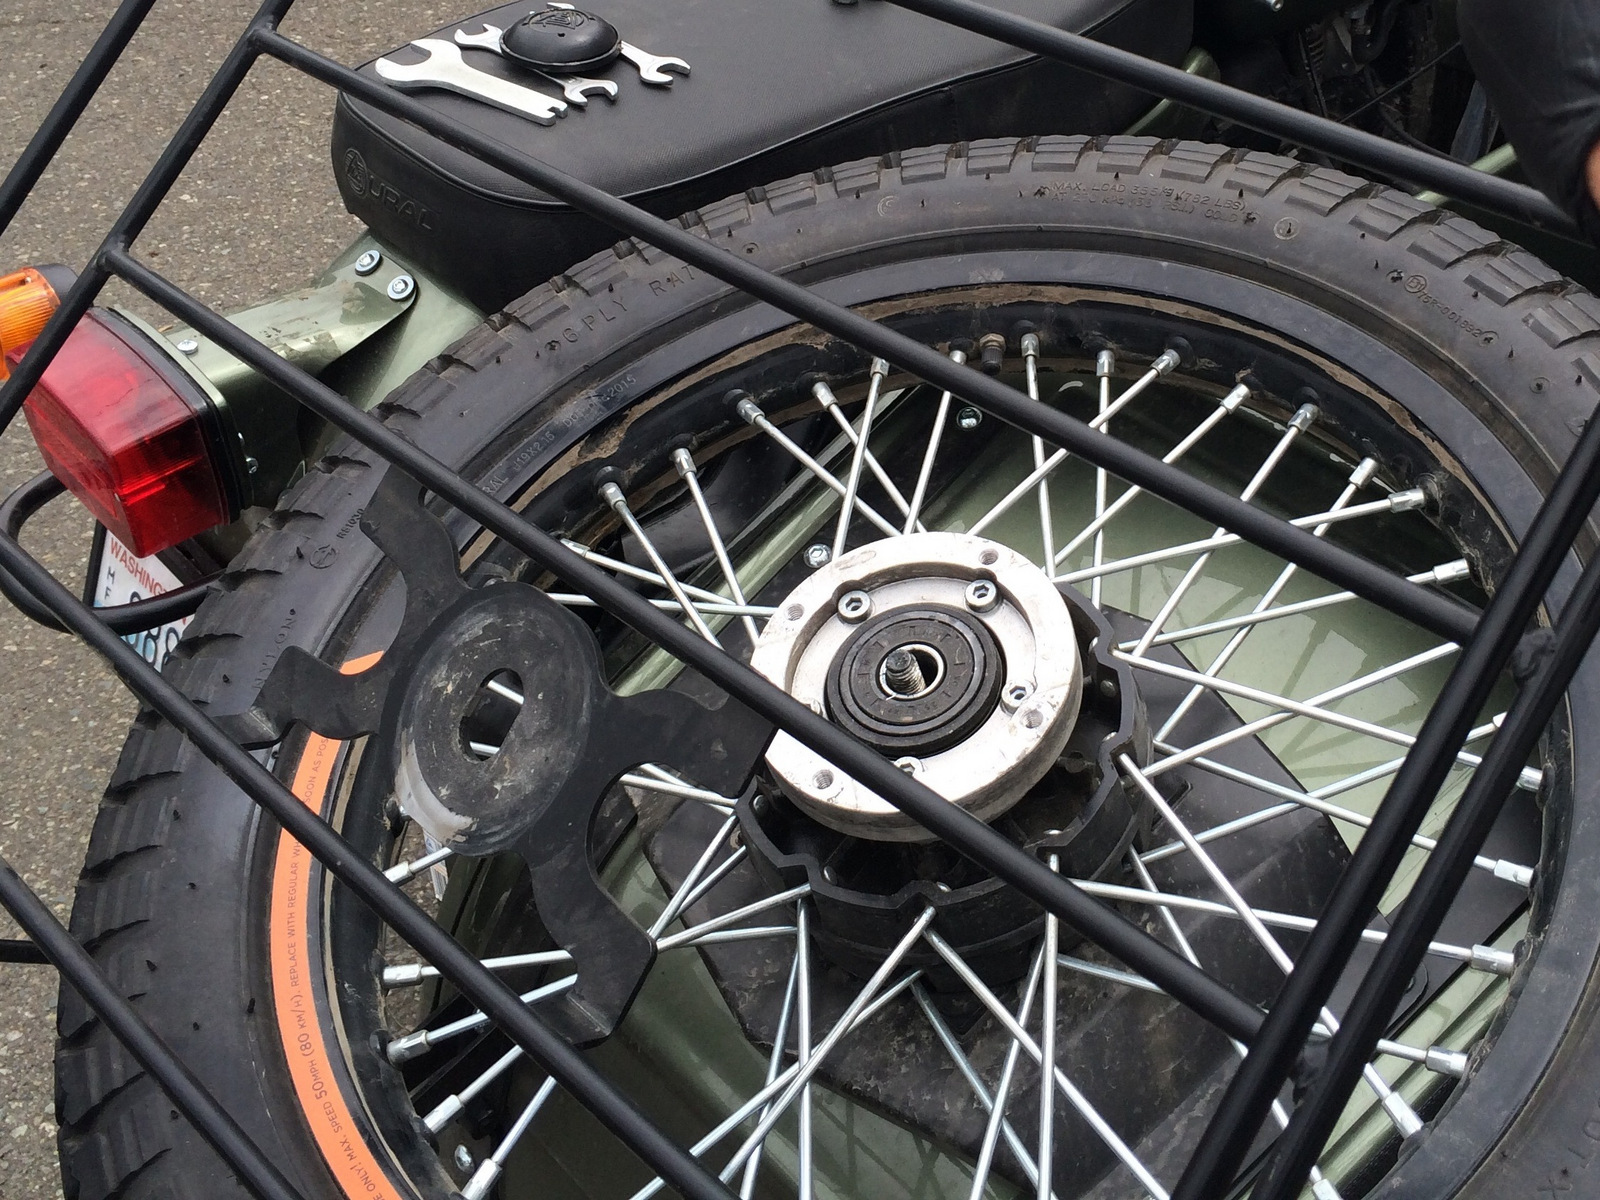
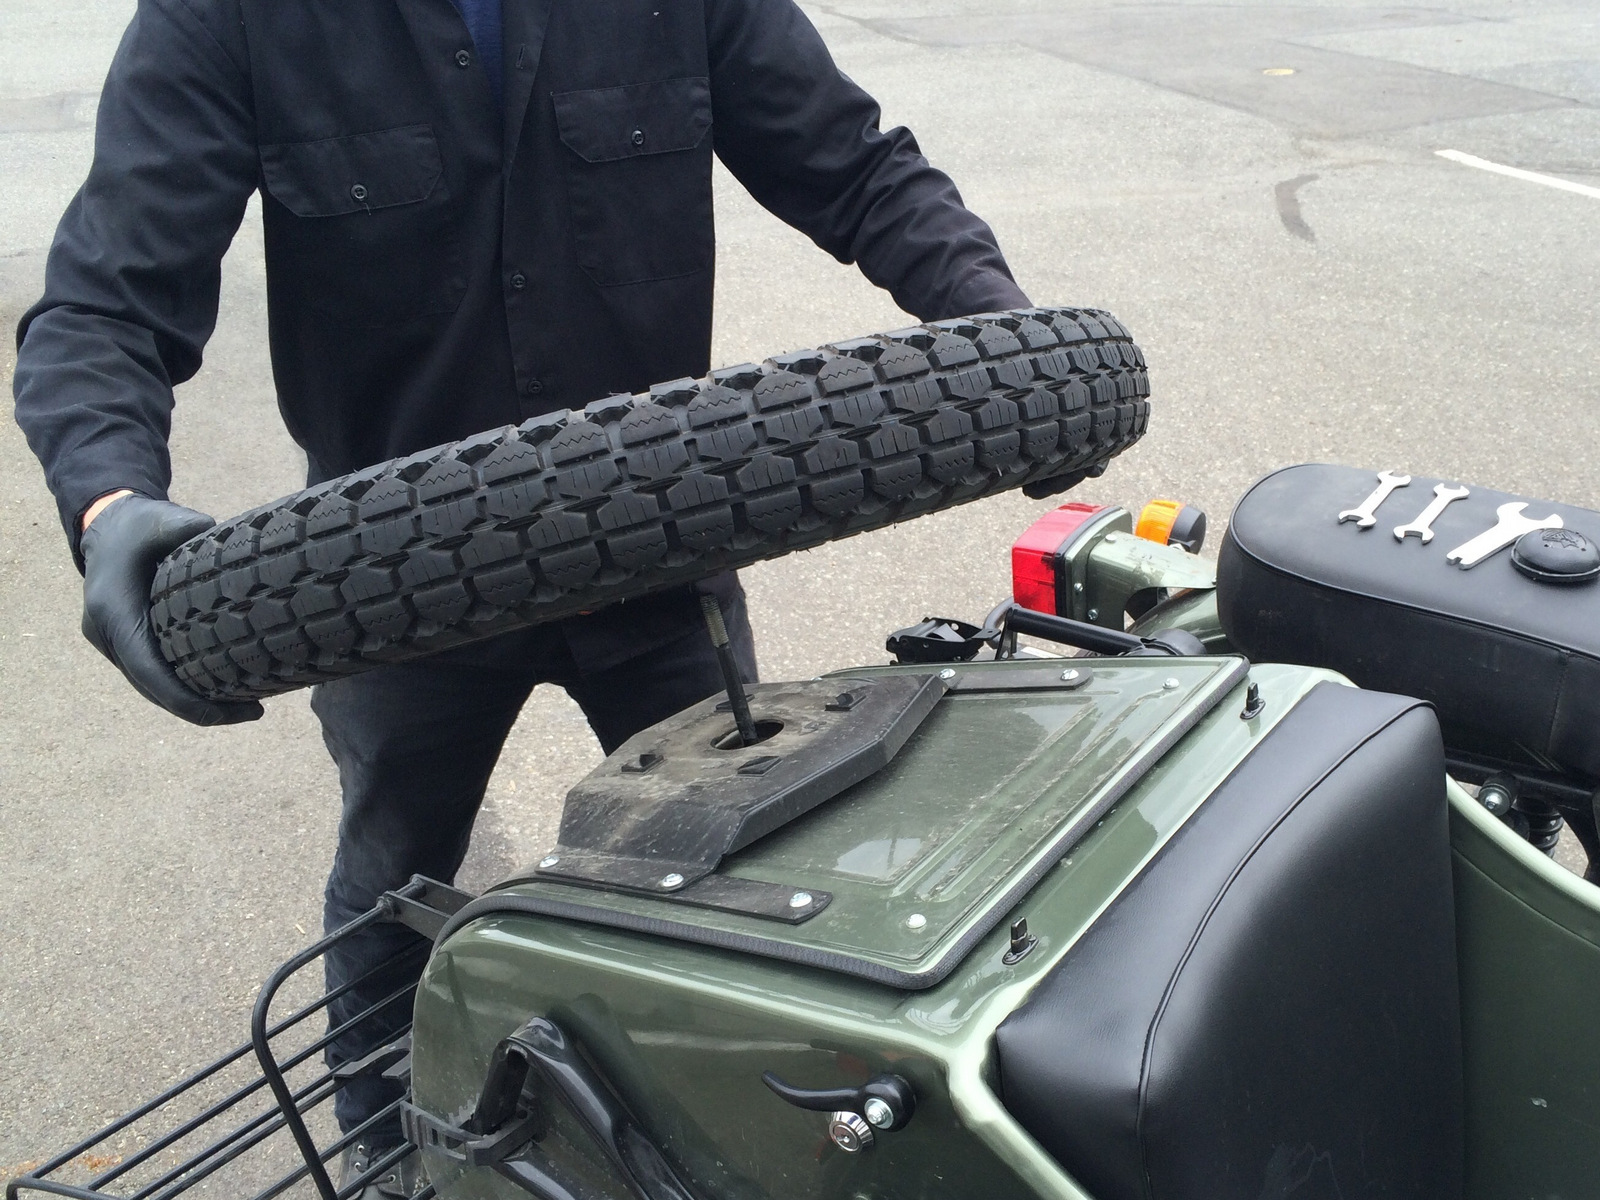
Step 11: Loosen the spare wheel retaining nut using tool from your Ural tool kit and remove the spare from the spare tire.

EWqQApGC1e1HGQUp

sjYMxsTFOvZ55vNX

ScFsXedEVq1lp1GN

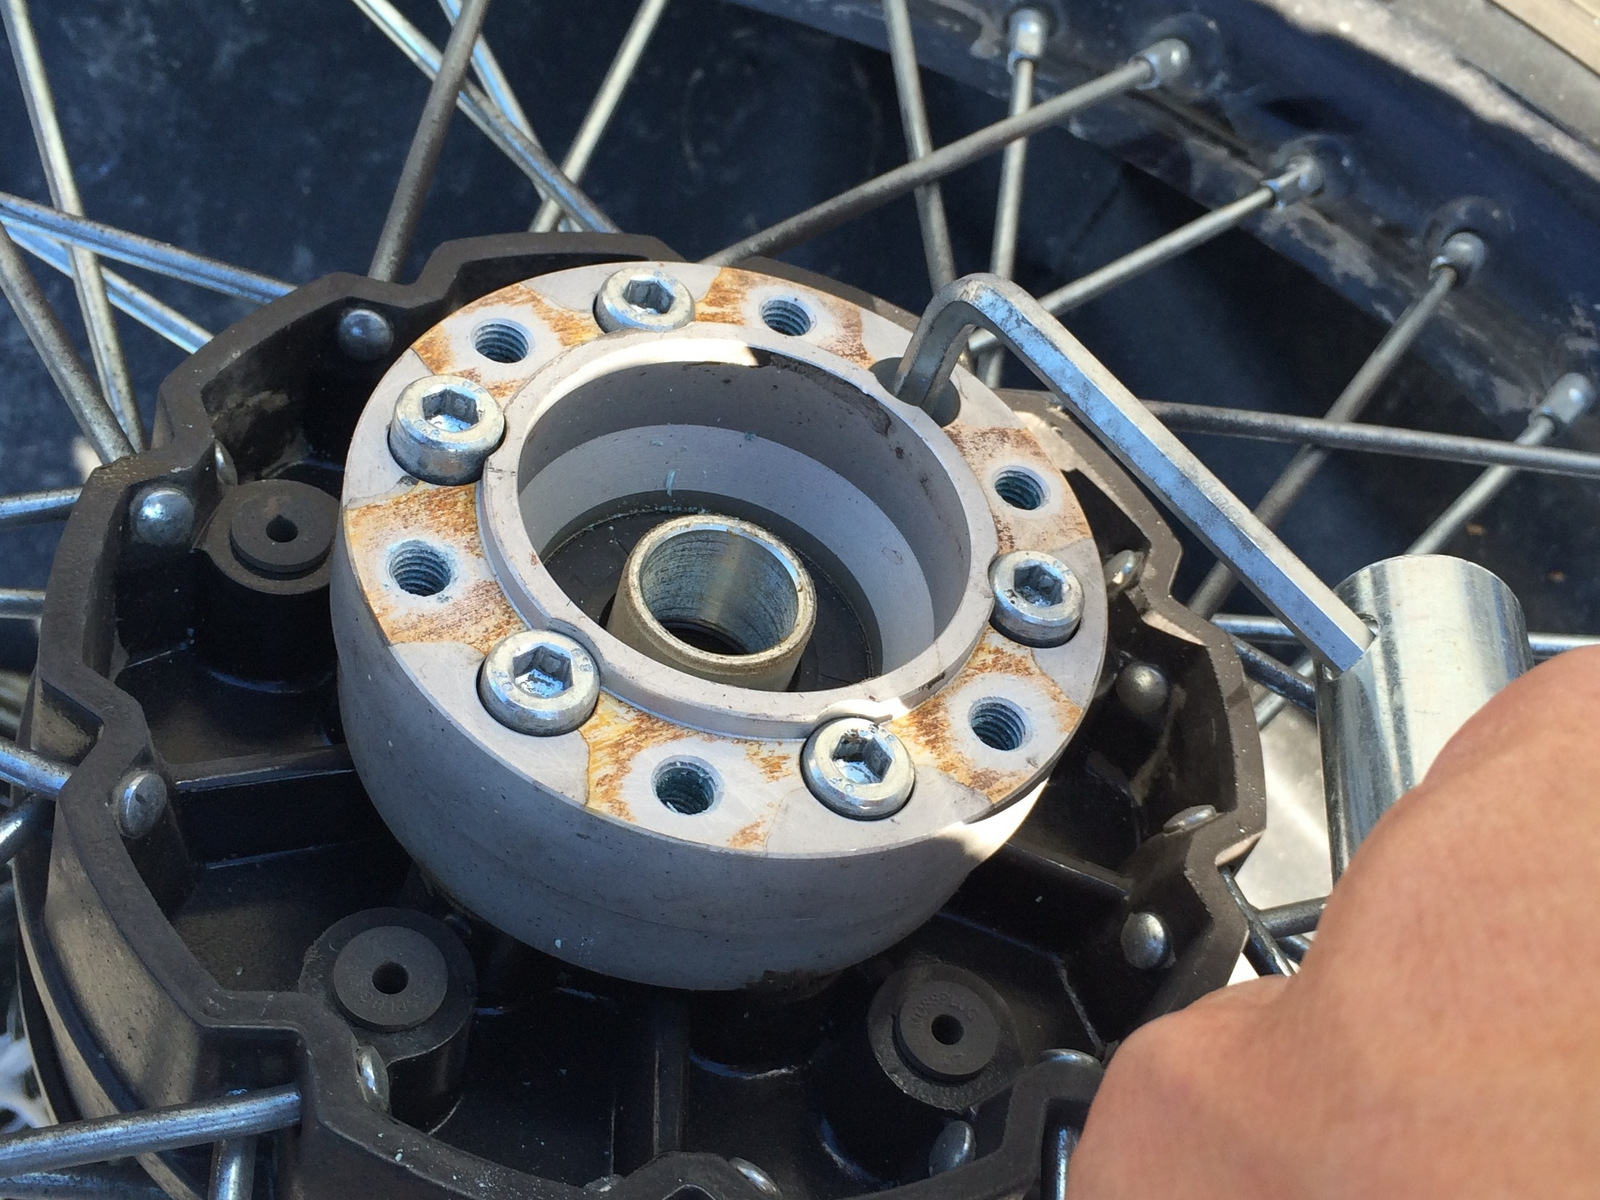
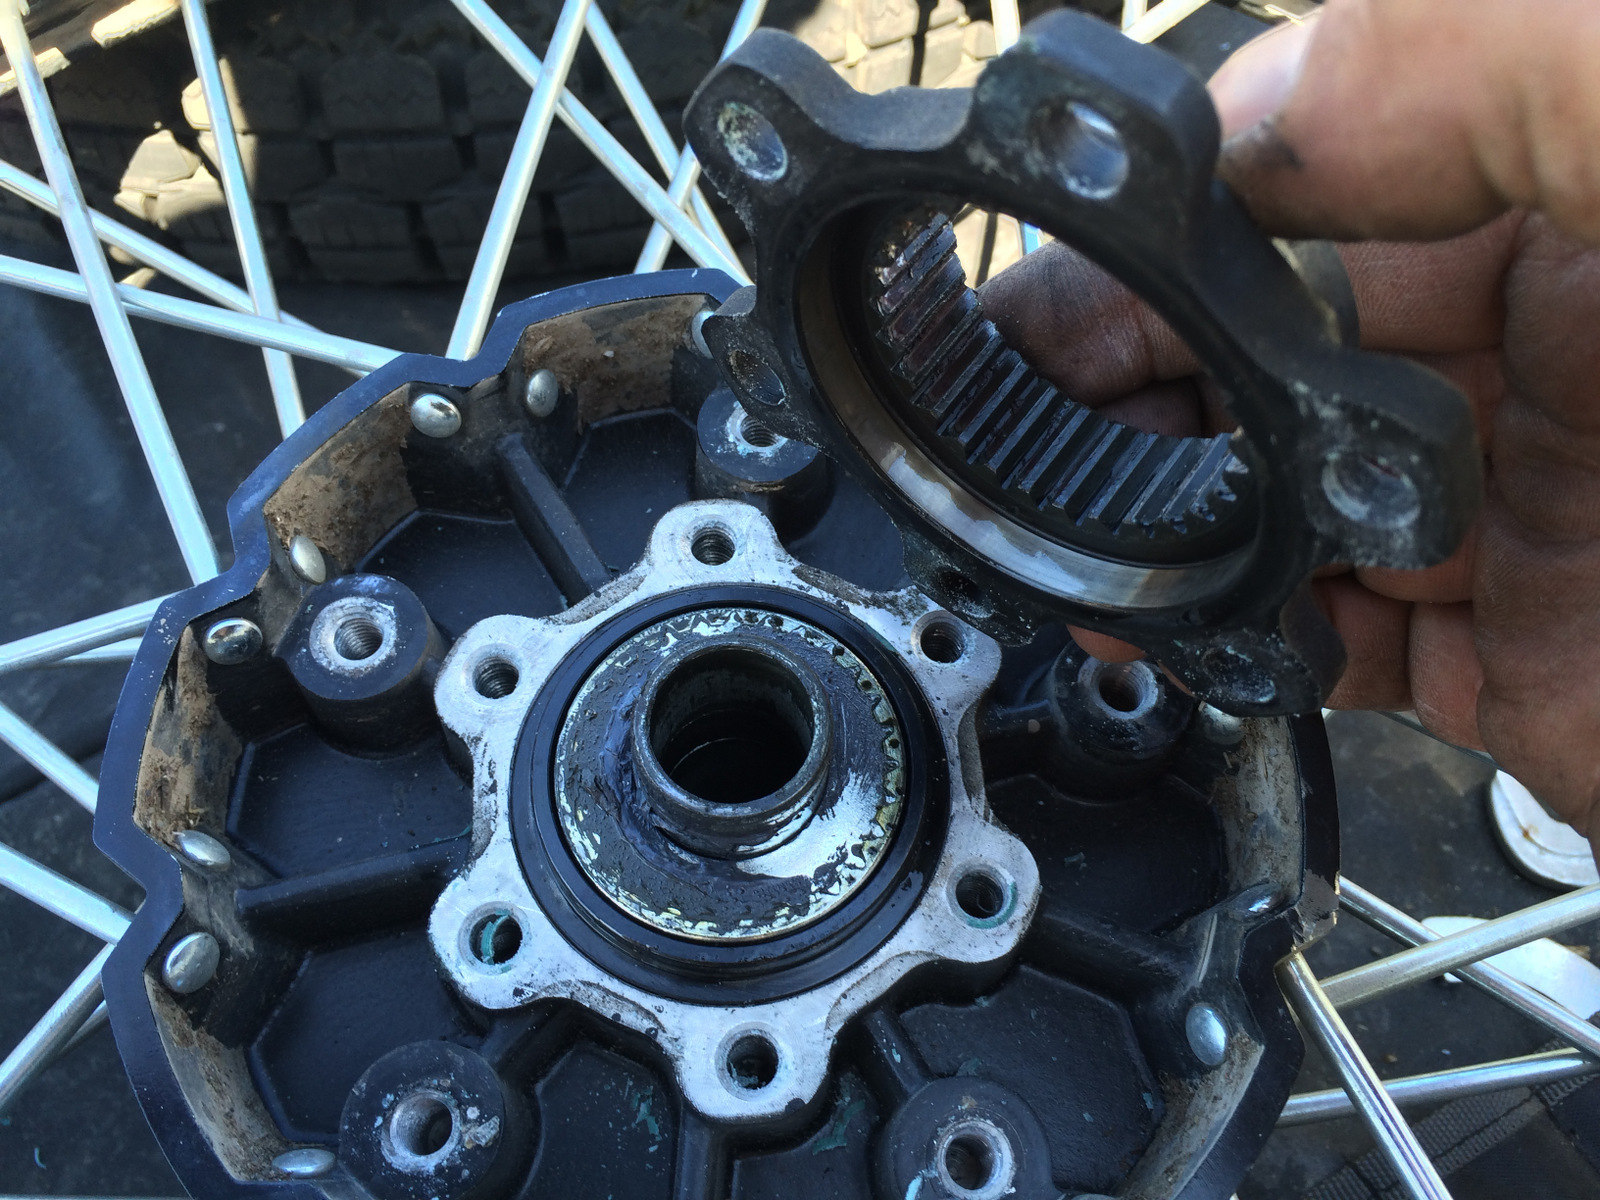
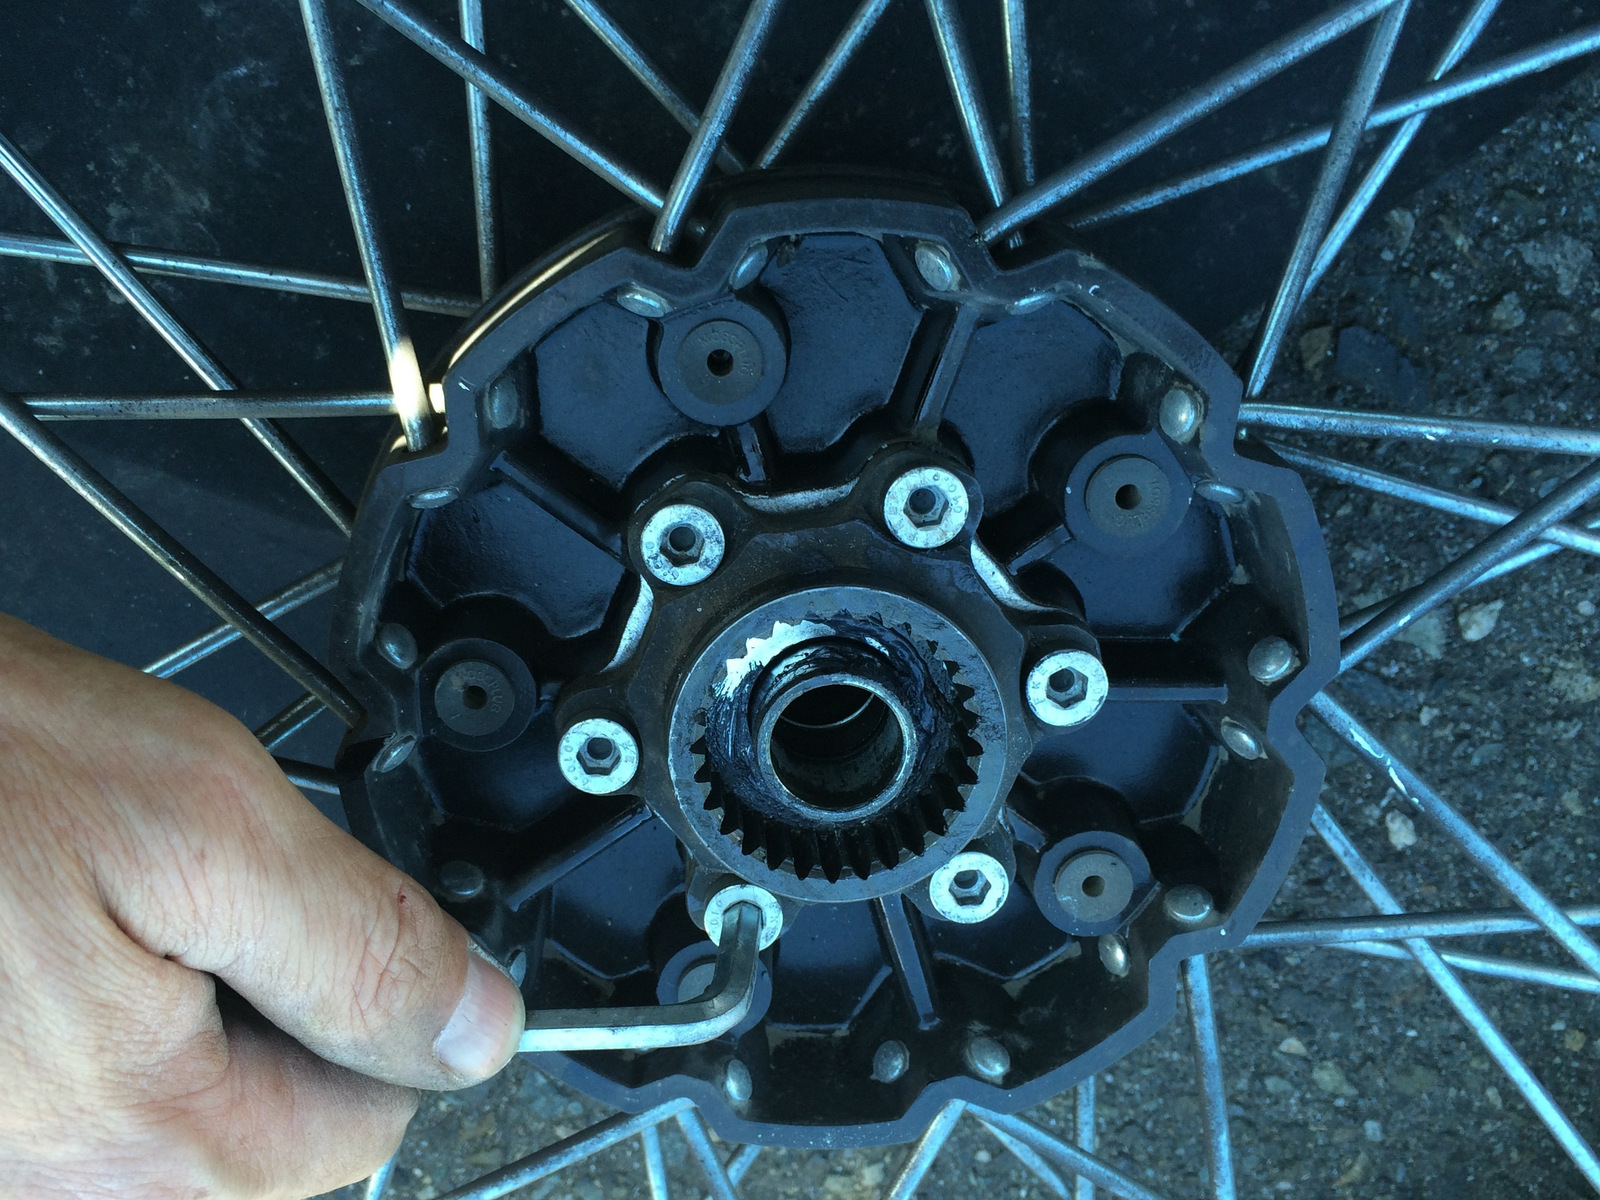
Step 12: Remove splined drive flange.  First, remove the six (6) socket head cap screws retaining the splined drive flange to the spare wheel hub.

LcVgSKsAEYgFeUW6-1

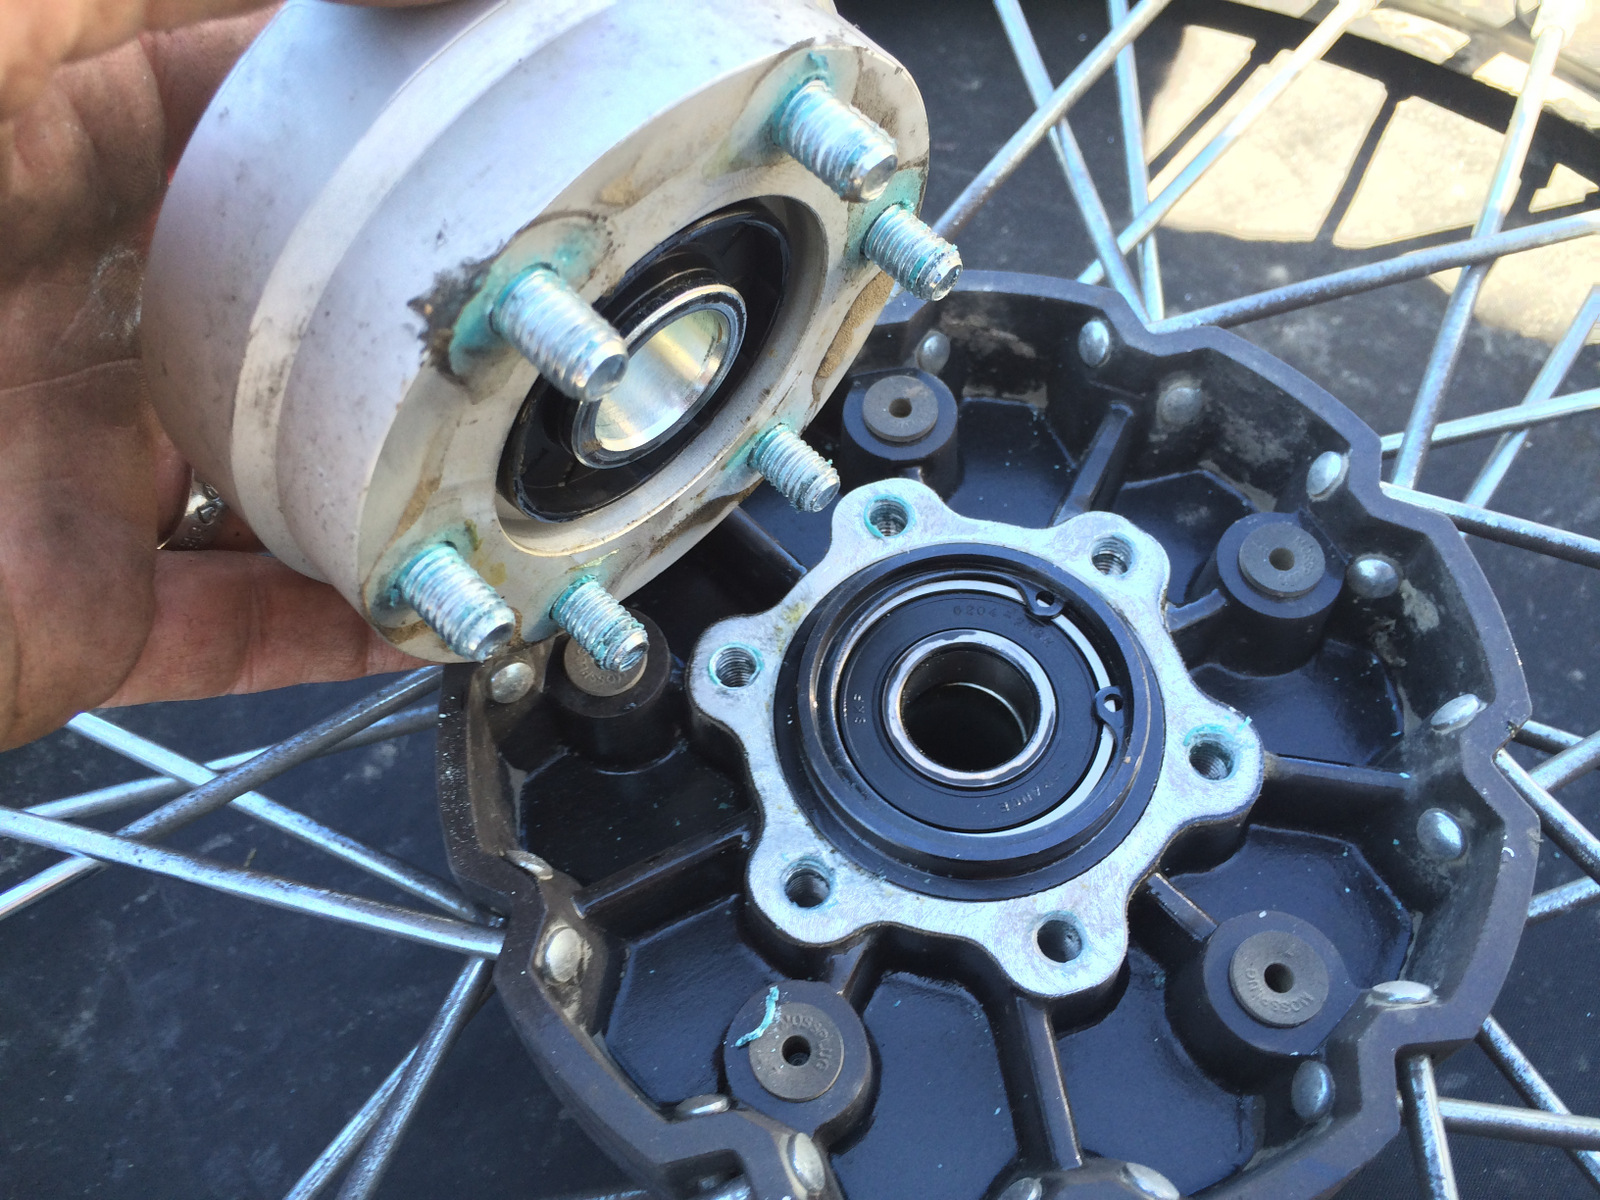
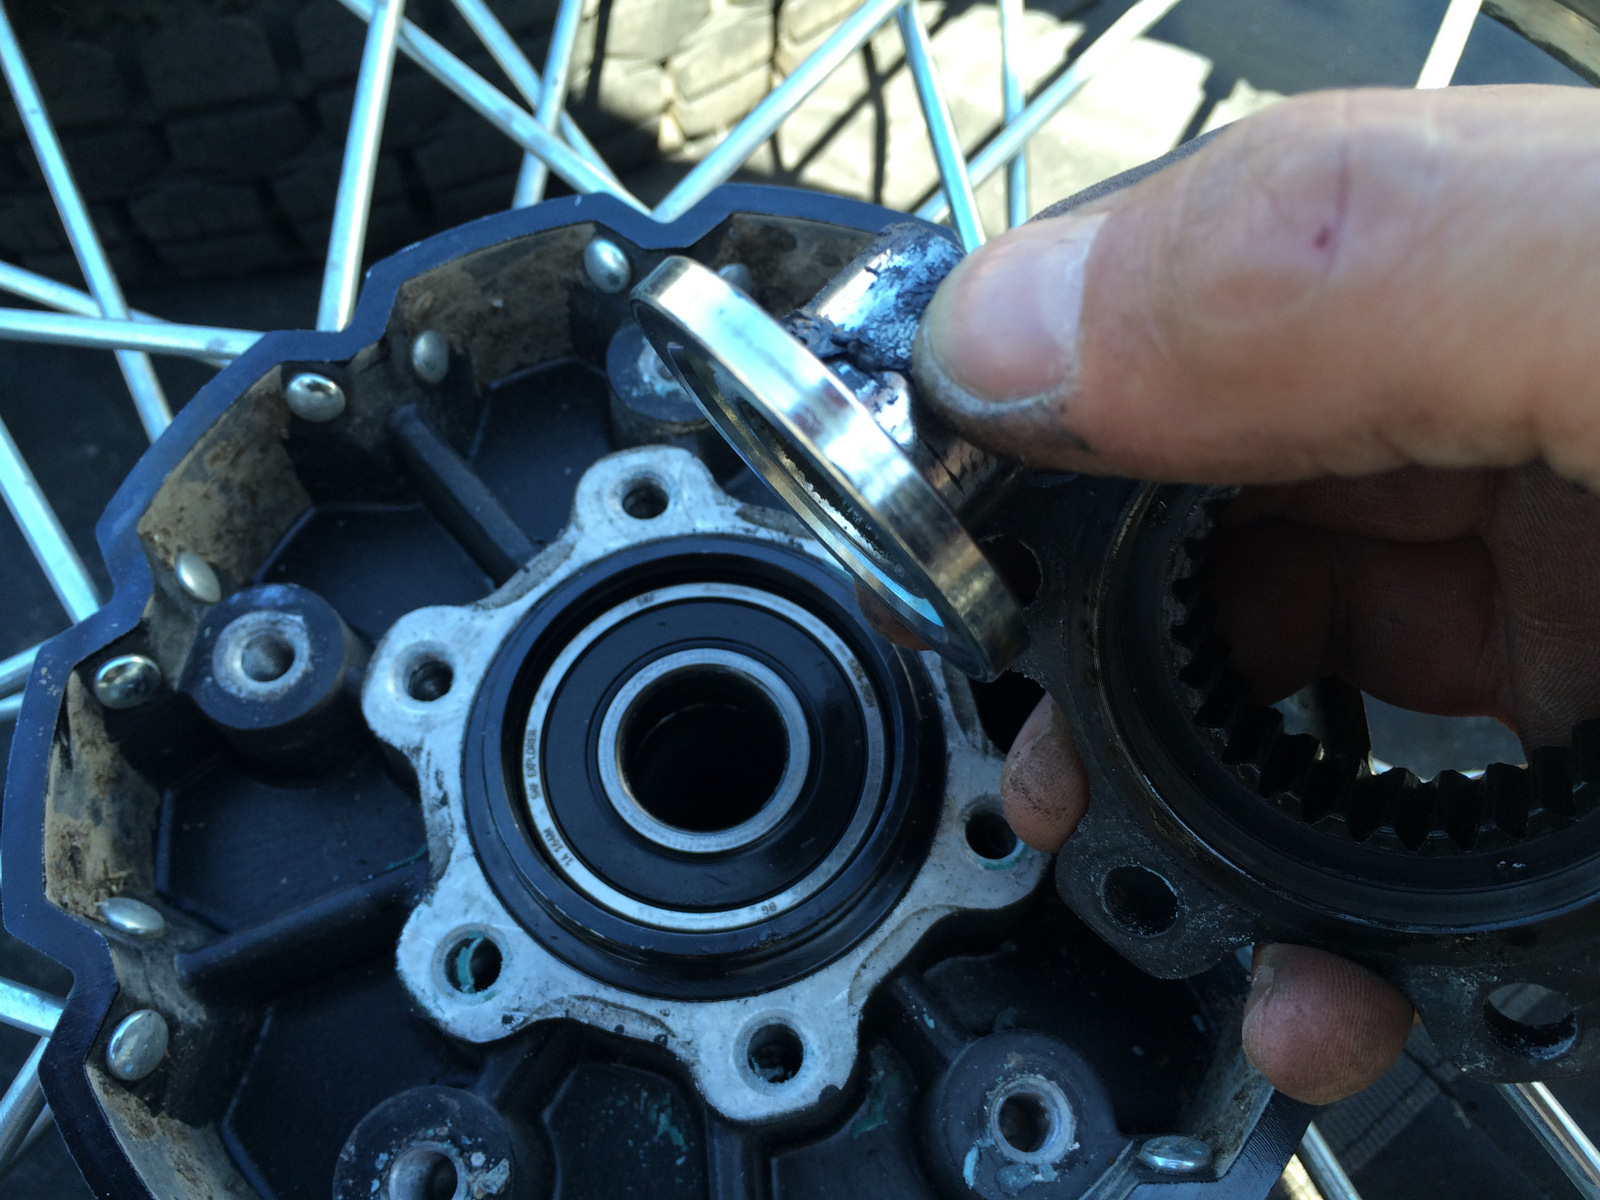
Step 13: Remove the splined flange, spacer and retaining ring.

f4BGOVWAQWrHQCFK

Step 14: Install the right side front hub bearing retaining circlip previously removed in Step 5 in place over the bearing on the spare wheel hub.

ppyrUT3gyg3wQyWn

Step 15: For safe keeping, install the splined flange, spacer and retaining ring removed from the spare wheel assembly onto the front hub.

FanCSTw443LaGxLq

Step 16: Secure the front rotor spacer to the spare wheel hub with the six (6) socket head cap screws removed previously in Step 4 using a 6mm tool.

LuvnZVLyvgolSU6U

Step 17: Secure the front rotor to the front rotor spacer with the six (6) socket head cap screws removed previously in Step 4 using a 6mm tool.

StMdjaUy5myLEiVf

o4AQKSfunB3QPRH3

Note: Mount the rotor and spacer where the splined drive flange was removed from the spare wheel hub in Step 6 opposite the spare wheel adaptor.

The spare wheel adaptor that is mounted on the wheel for use on the rear position DOES NOT need to be removed for the spare wheel assembly to function on the front position.

Step 18: Install the spare wheel assembly by lifting into place and partially insert the front axle from the left hand side.

6BSTWUwUvY5jACqw

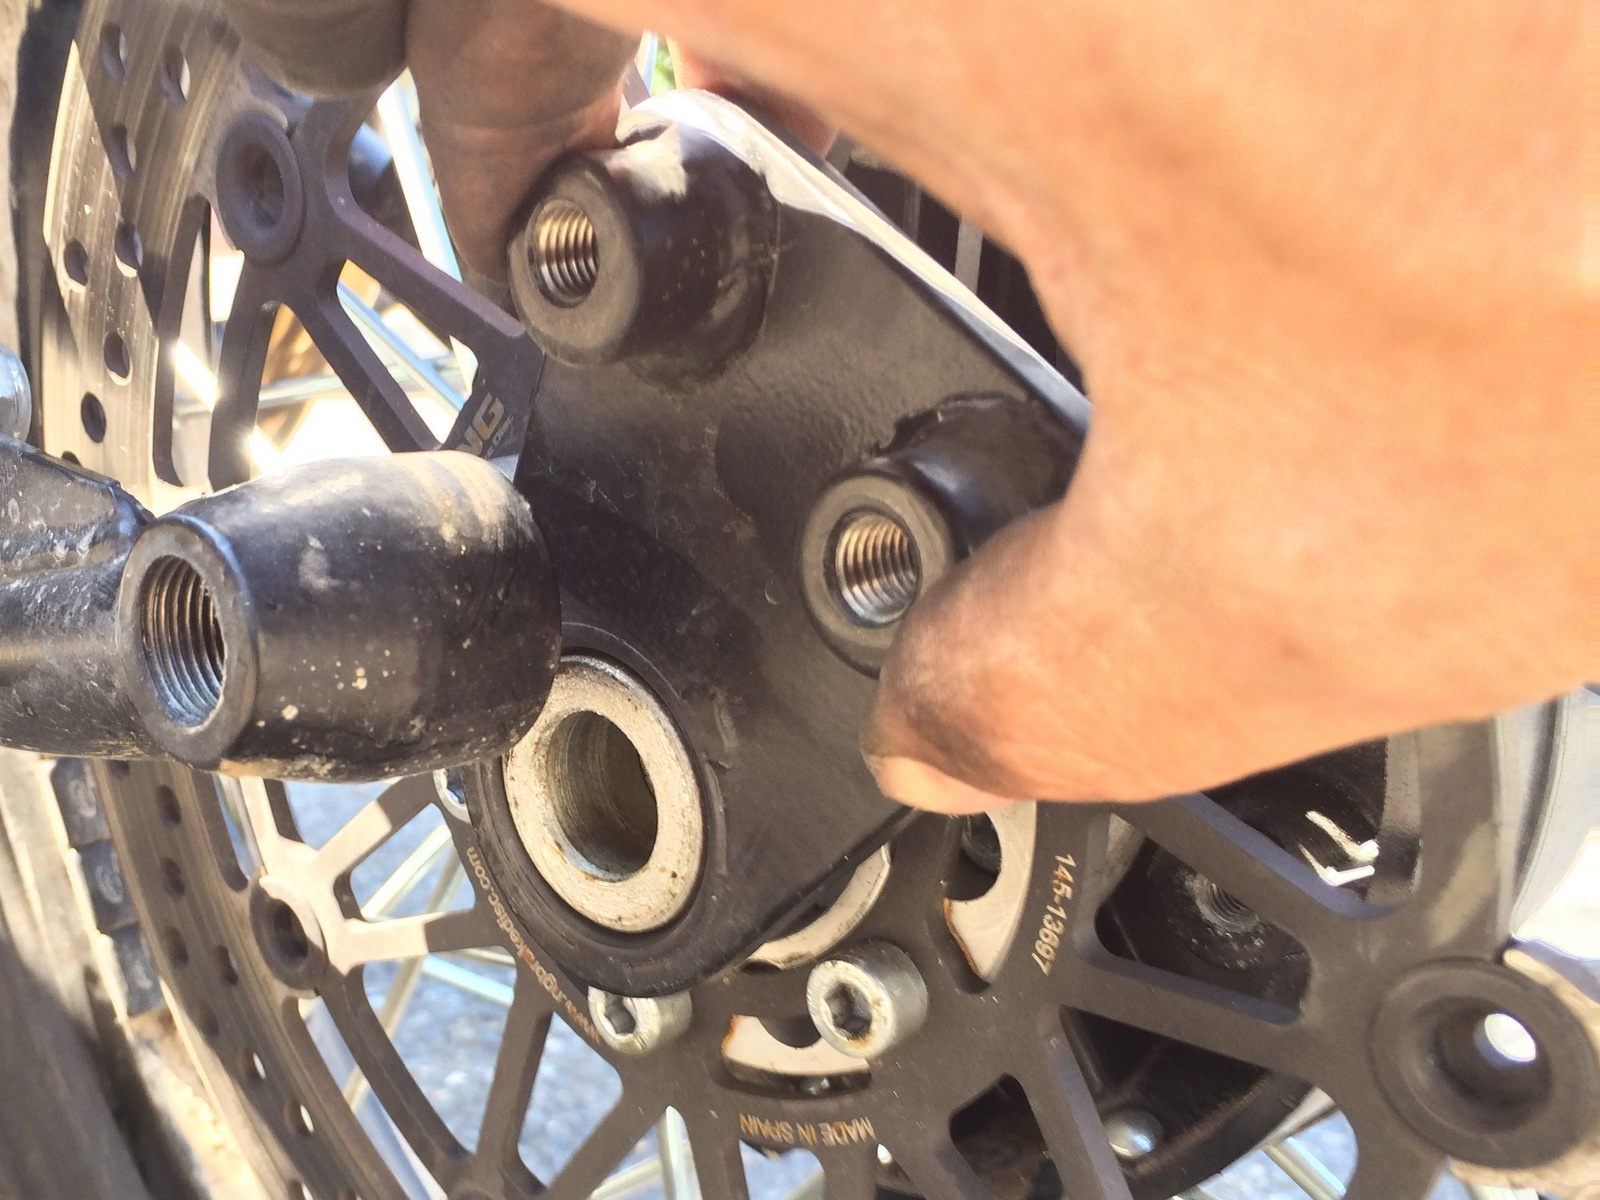
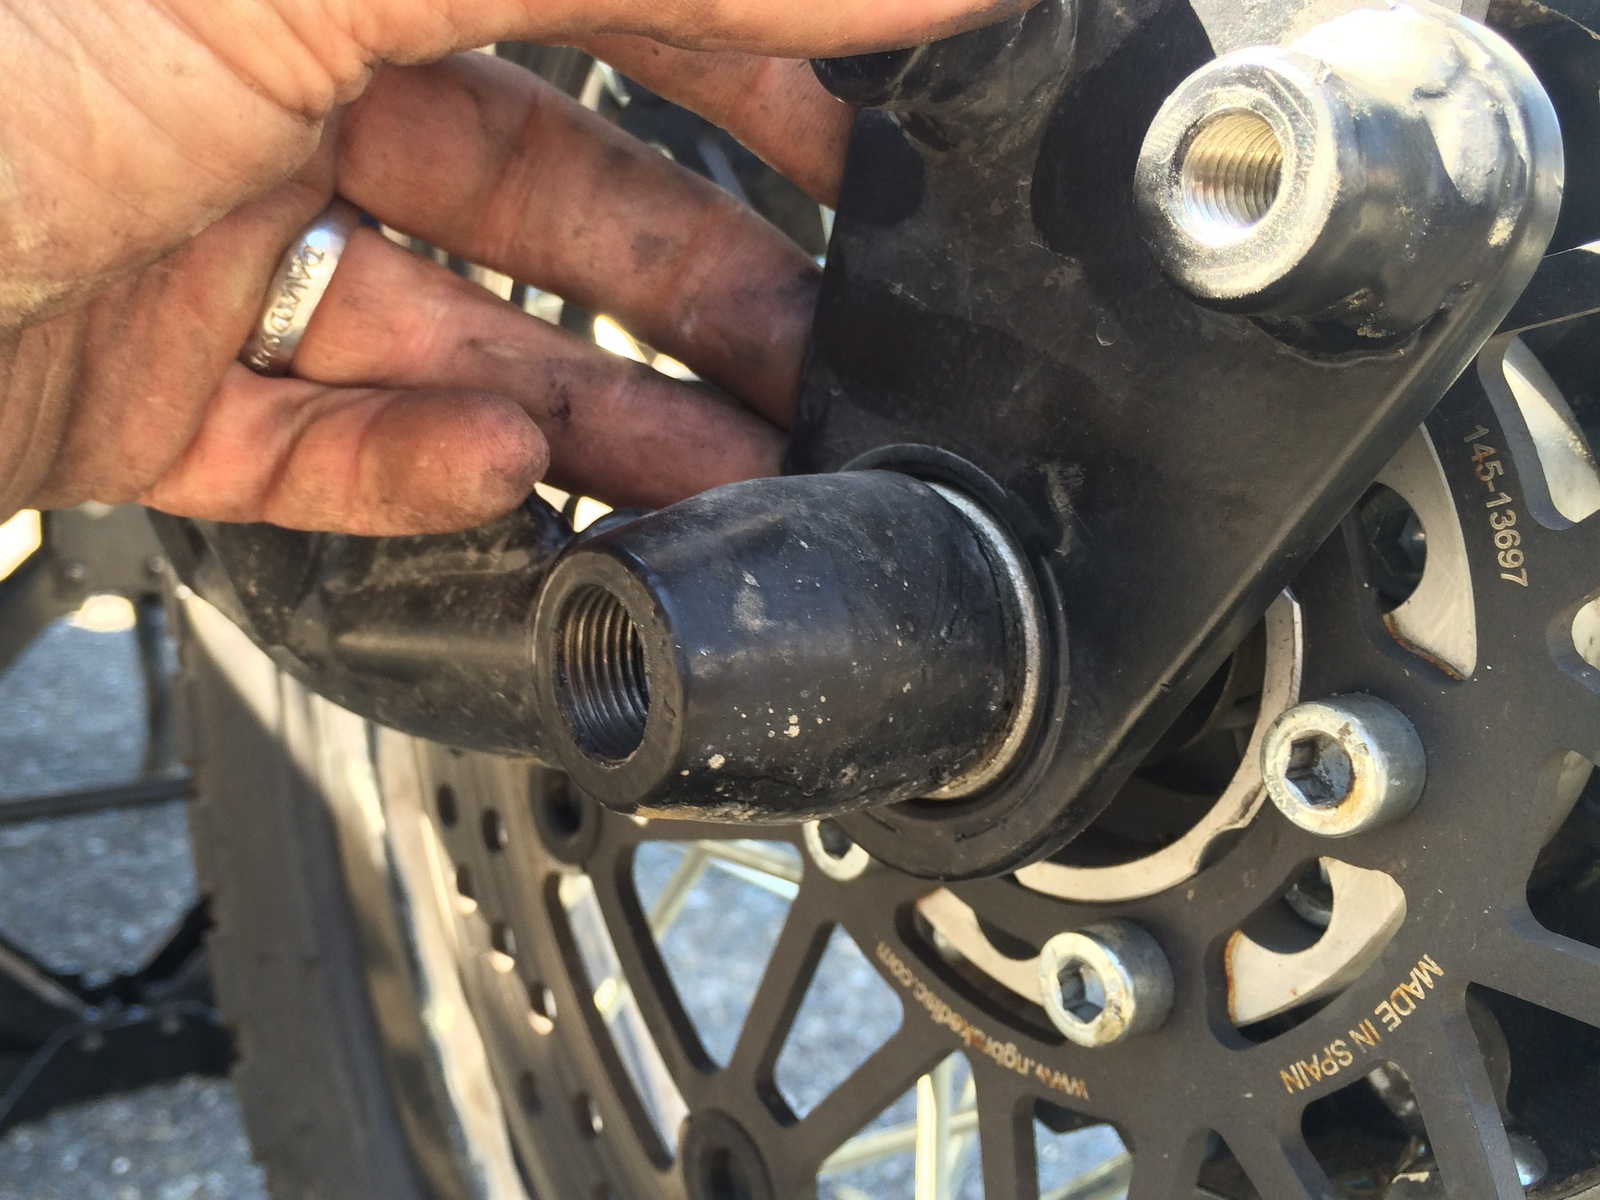
Step 19: Having noted the position of the lower caliper bracket on the axle in Step 3, orientate in the lower caliper bracket in the proper position on the right side of the front hub and continue axle installation.

iVhG6mgXBrrDZDHl

3XDGP3UjunjLiopr

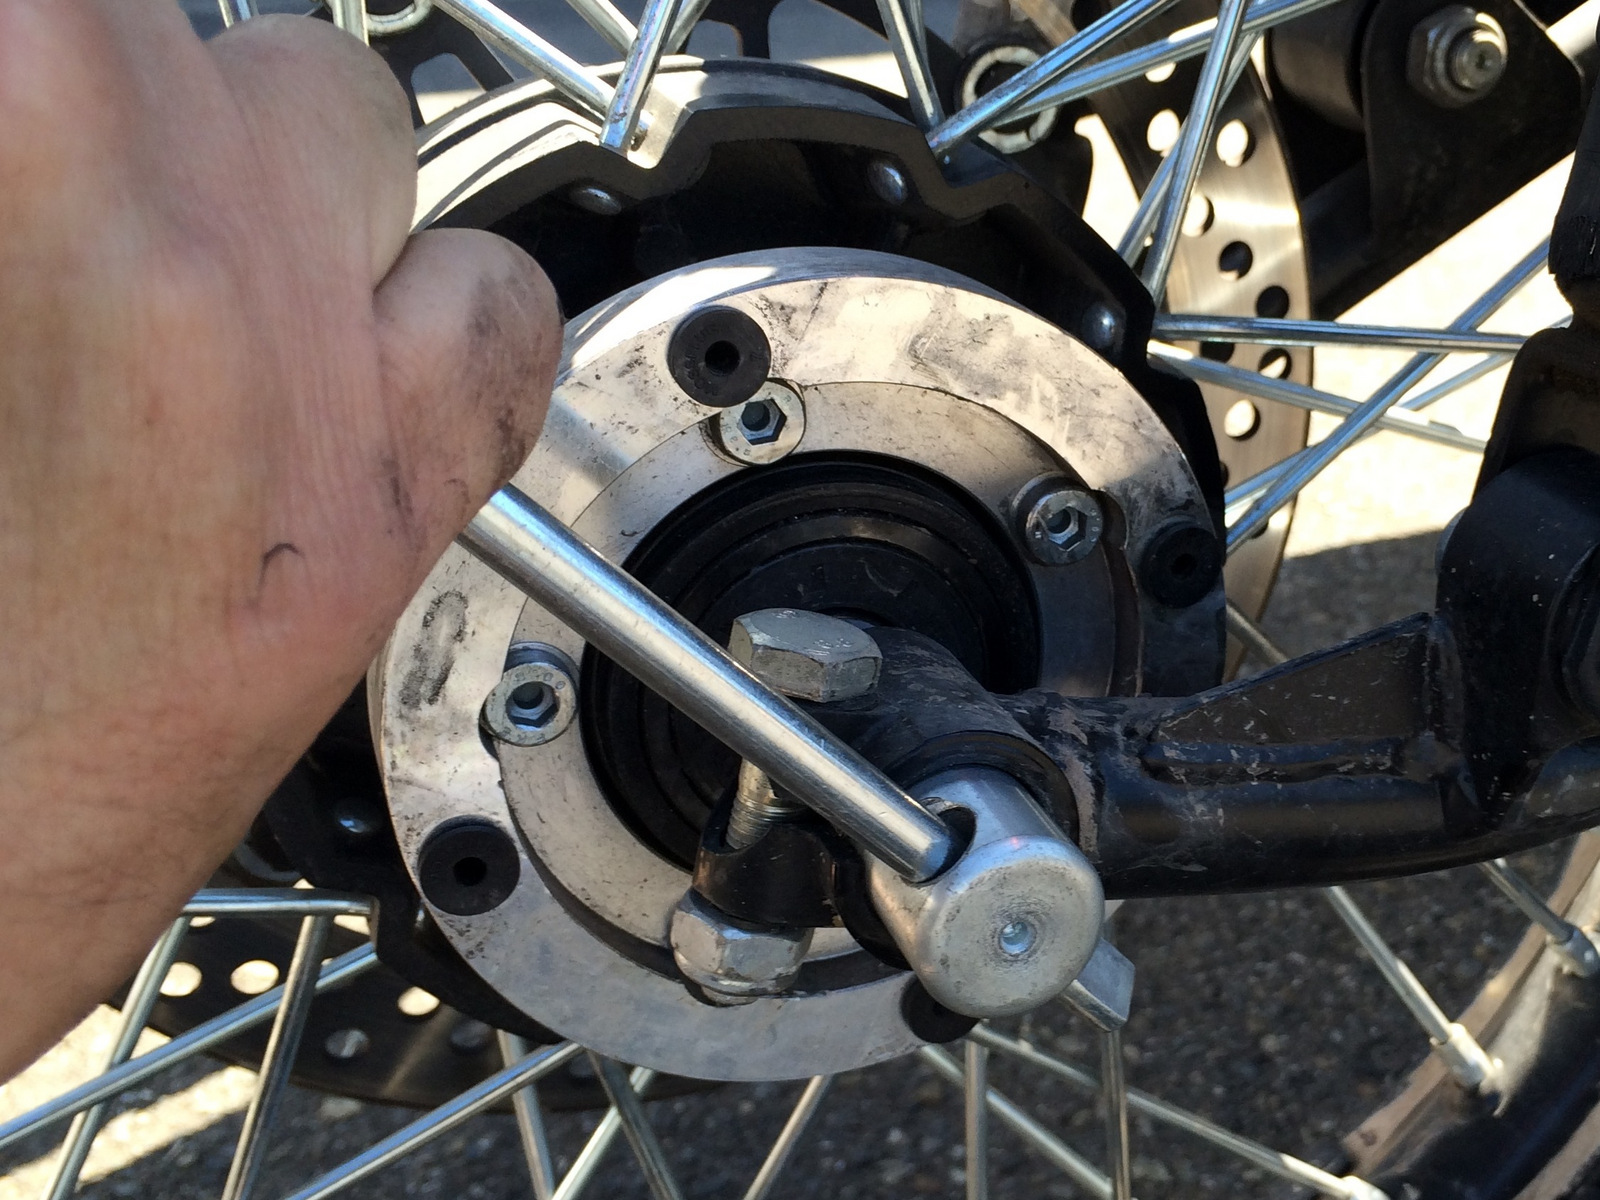
Step 20: Insert a suitable tool (screwdriver works well) into the hole on the left side of the axle and turn counterclockwise to tighten until it is fully seated.

wIybVXHwrCMptsEB

Step 21: Secure the front axle pinch bolt on the left side of the front swing arm using two (2) 17mm tools.

iXEJsOSpLaOeaEUS

Step 22: Re-install the front caliper back in position over the front rotor.

MrsljU6ZNFXwgwU1

6J4qCRTQAOv2ZHfK

Step 23: Reinstall the two bolts securing the front brake caliper upper bracket to the lower caliper bracket with a 17mm tool.

tXLfOq5qv6JCDVvT

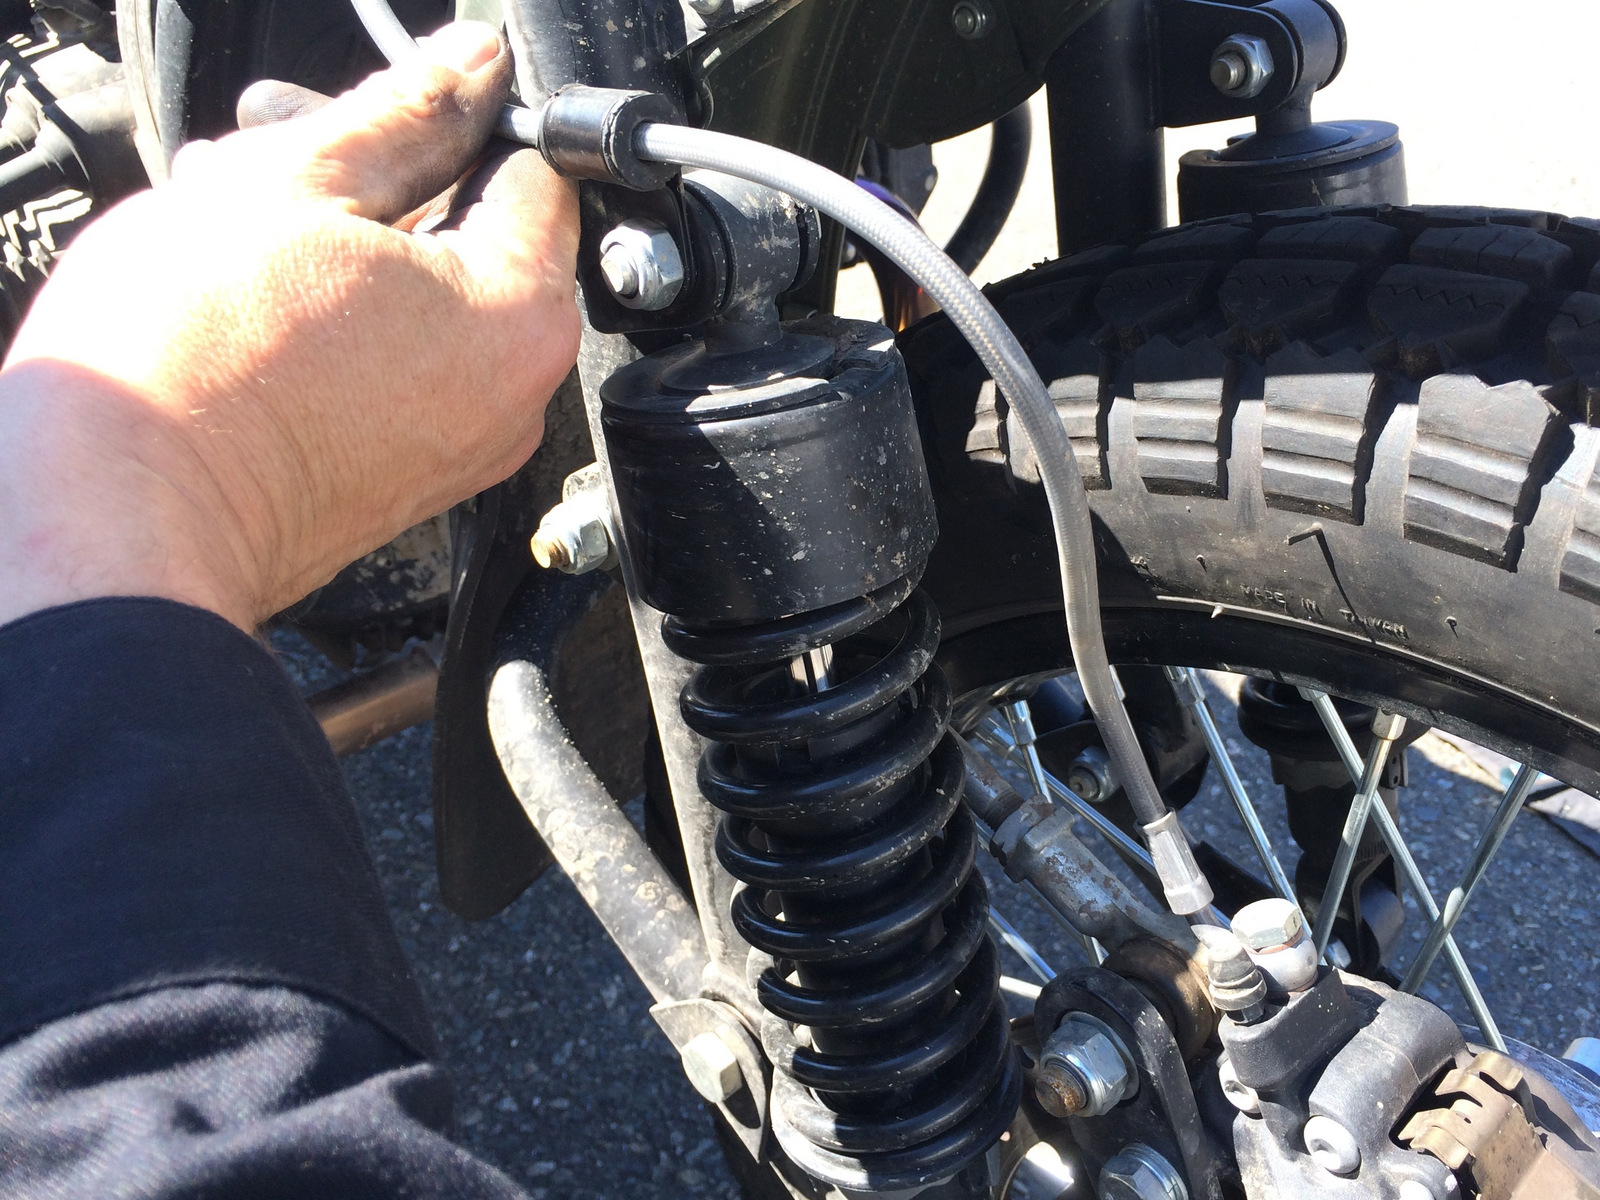
Step 24: Confirm the front brake hose is routed properly and all hardware is securely fastened.

kORTBNZMHPqTPUqP

Step 25: Remove support used under the engines oil sump to suspend the front wheel assembly off the ground.

KFBAKW6oSGR1Ml6T-1

Step 26: Lower the motorcycle from the center stand by pushing forward on the handle bars and covering the front brake lever to prevent the motorcycle from rolling away.

Step 27: Set parking brake.

aVJ2gFiADX6SMt4R

Step 28: Install the front wheel assembly onto the spare tire carrier.

ScFsXedEVq1lp1GN

Step 29: Secure the spare wheel retaining nut using the tool from your Ural tool kit (Part No. IMZ-8.128-24018).

EWqQApGC1e1HGQUp

Step 30: Almost done! Clean up tools and debris from the surrounding area and hit the road!

VdXECThUXDnWl3Go-1